European Auto Source (EAS)
BMW Garage BMW Meets Register Today's Posts

Go Back   BMW M3 and BMW M4 Forum > BMW F80 M3 / F82 M4 Technical Topics > DIY and Coding Discussions

Post Reply
 
Thread Tools Search this Thread
      06-26-2014, 02:25 PM   #1
Ryan@IND
Ryan@IND's Avatar
United_States
1764
Rep
7,650
Posts

Drives: ACR
Join Date: Mar 2008
Location: Chicago

iTrader: (18)

IND Painted Reflector Installation Procedure

Painted reflectors are among the first additions made by any owner of a modern BMW. The unsightly orange reflectors installed in cars bound for North America instantly break the smooth lines of BMW bumpers.

IND provides painted reflectors as a cost effective solution relative to the purchase of a OEM European bumper. We start the process using the OE BMW reflectors for a factory fit, and the same paint process we would use to spray an entire car. Each reflector is sanded, prepped for paint, primed, then painted. We ensure that all lettering on the face of the reflector is completely removed providing the same finish as your factory bumper.


Many enthusiasts enjoy installing their own painted reflectors, so we’ve created this installation DIY to help.

Tools needed:

• 8mm socket and ratchet
• Adhesive remover or cleaning solvent
• Nylon prybar (optional)

Step 1:

First, turn the steering wheel to full lock, in any direction. This will expose the fender liner.

Step 2:

With the fender liner exposed, begin removing the 8mm screws near the front reflectors.

Step 3:

Once the fender liner screws are removed you will have access to the back of the bumper cover. Using your hands or a nylon prybar pull the edge of the reflector from the bumper cover. This may take some work to remove, but the leverage applied by a nylon prybar makes the job much easier.

Step 4:

After the reflector is removed from the bumper cover take a cloth and some adhesive remover or solvent and remove the excess adhesive.

Step 5:

Now that the surface is clean remove the adhesive cover on the painted reflector and push reflector in place. Make sure to apply even pressure around all edges.

Step 6:

With the reflector installed it is time to button her up. Place the fender liner back into position and secure it to the bumper with the 8mm screws.


__________________
IND DISTRIBUTION | 866-963-4520 • INSTAGRAMFACEBOOKFLICKR

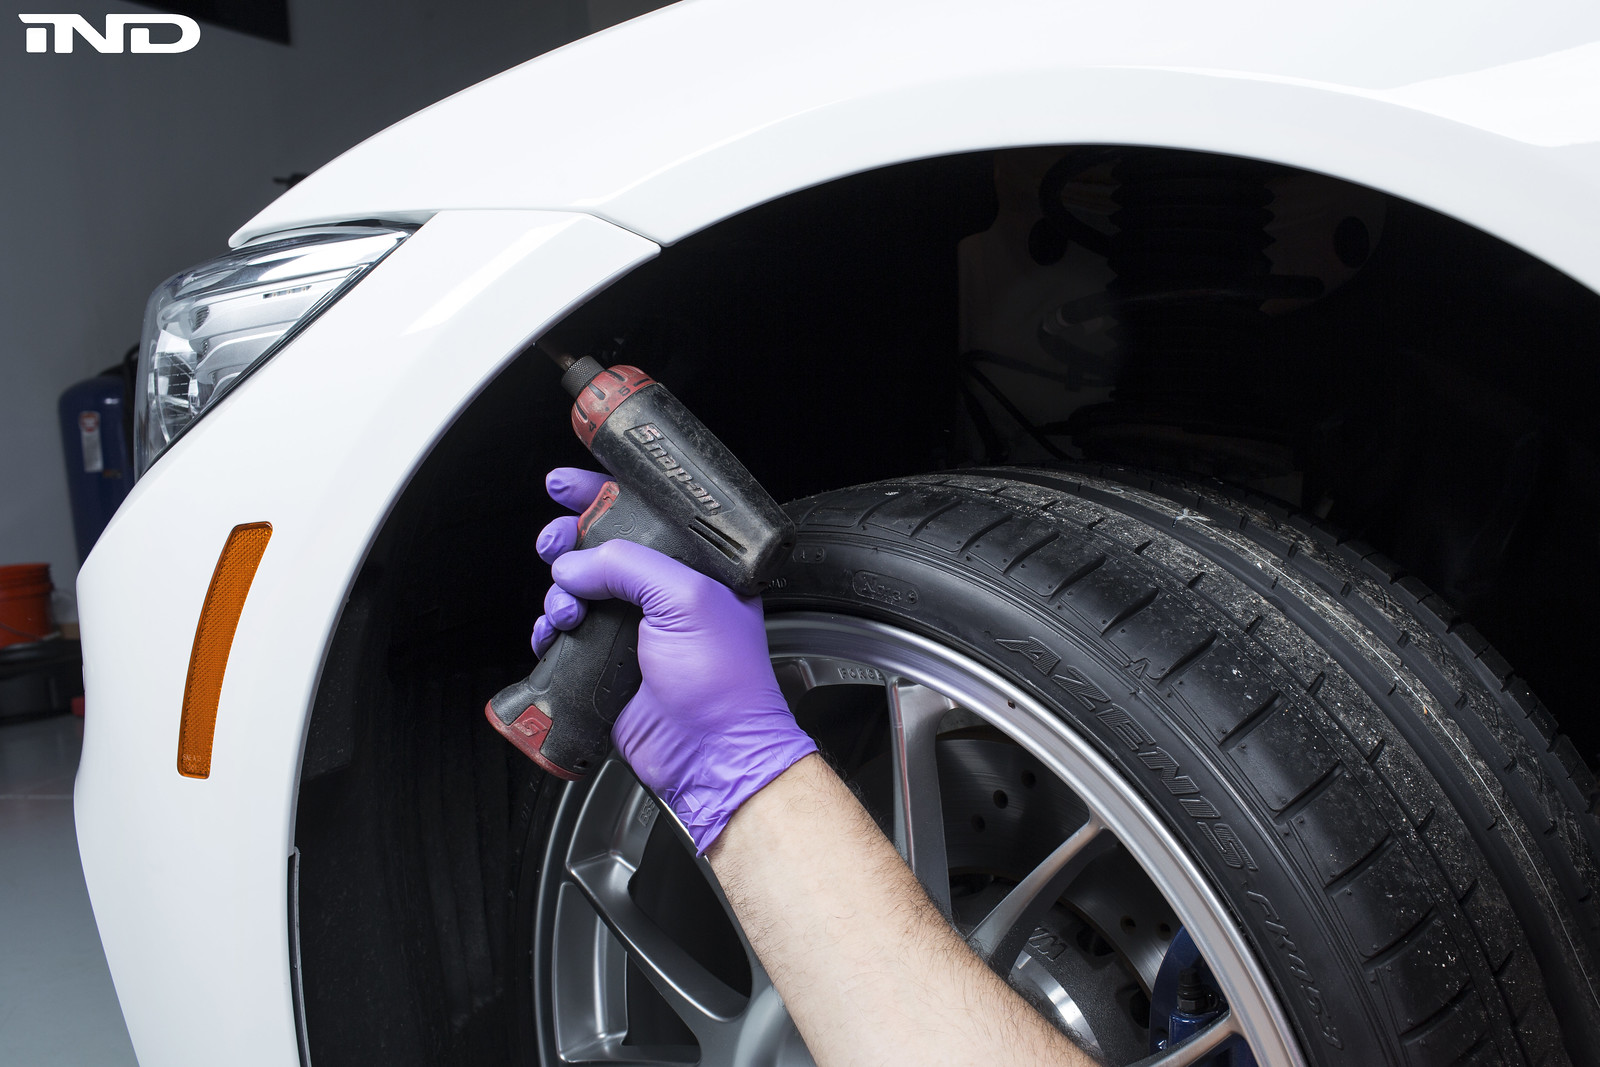
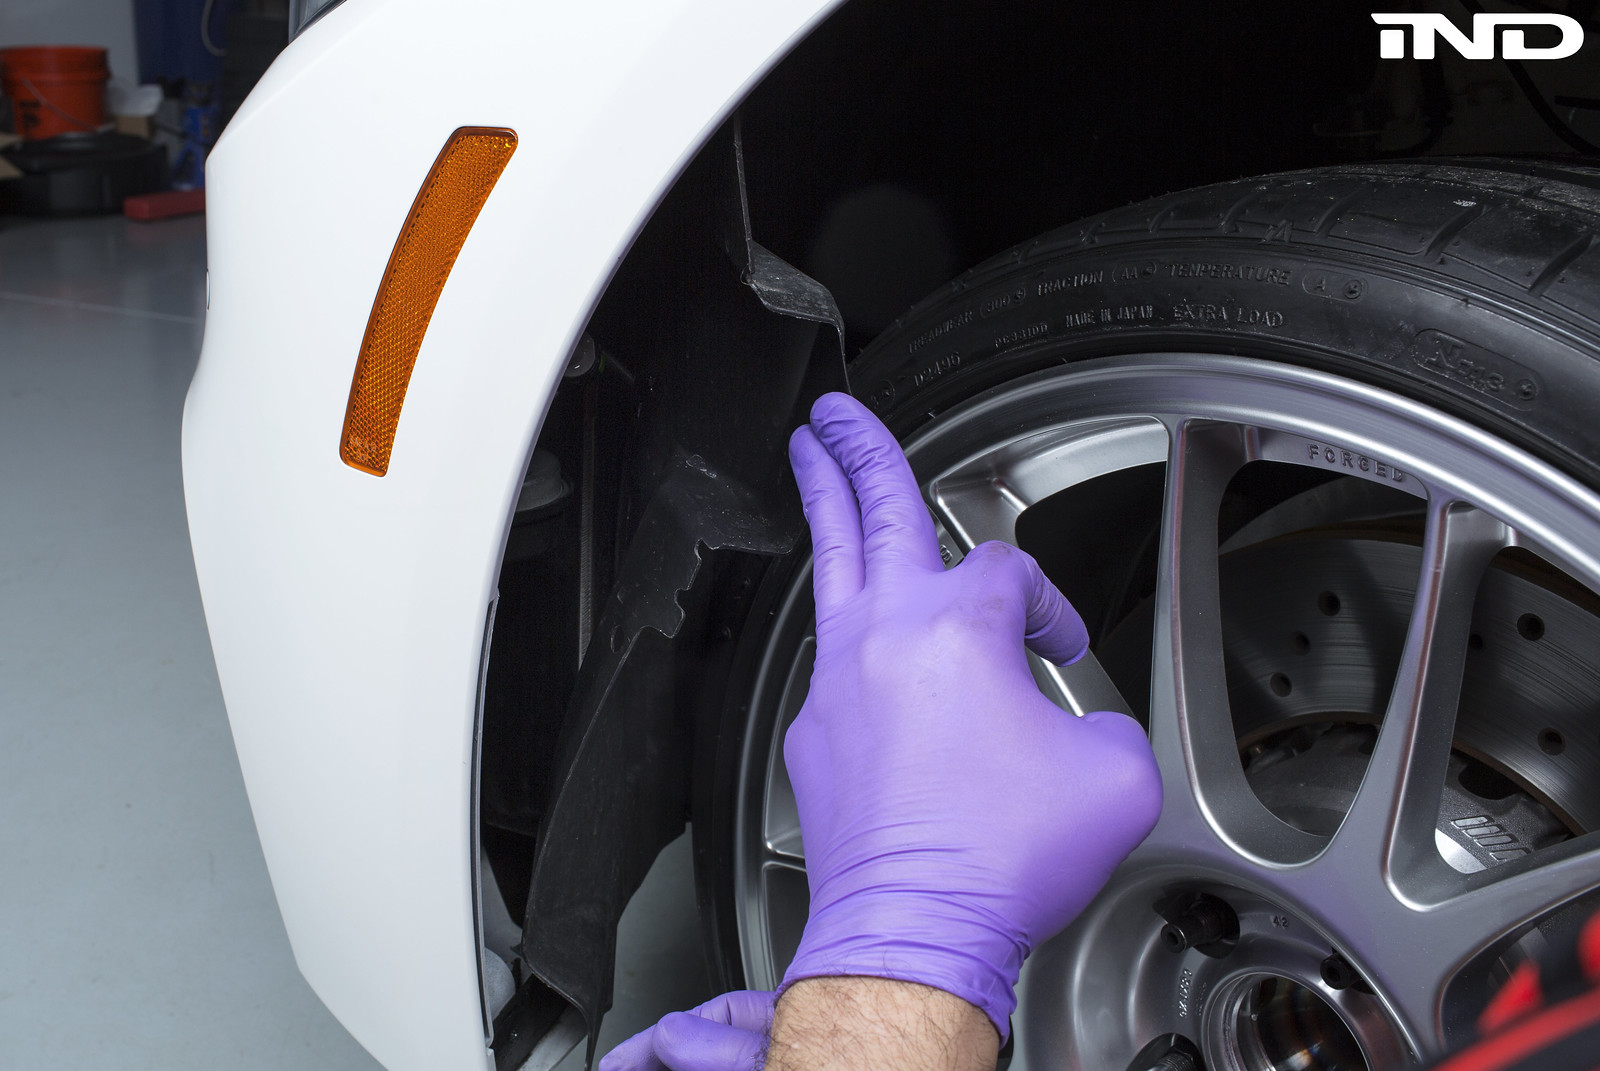
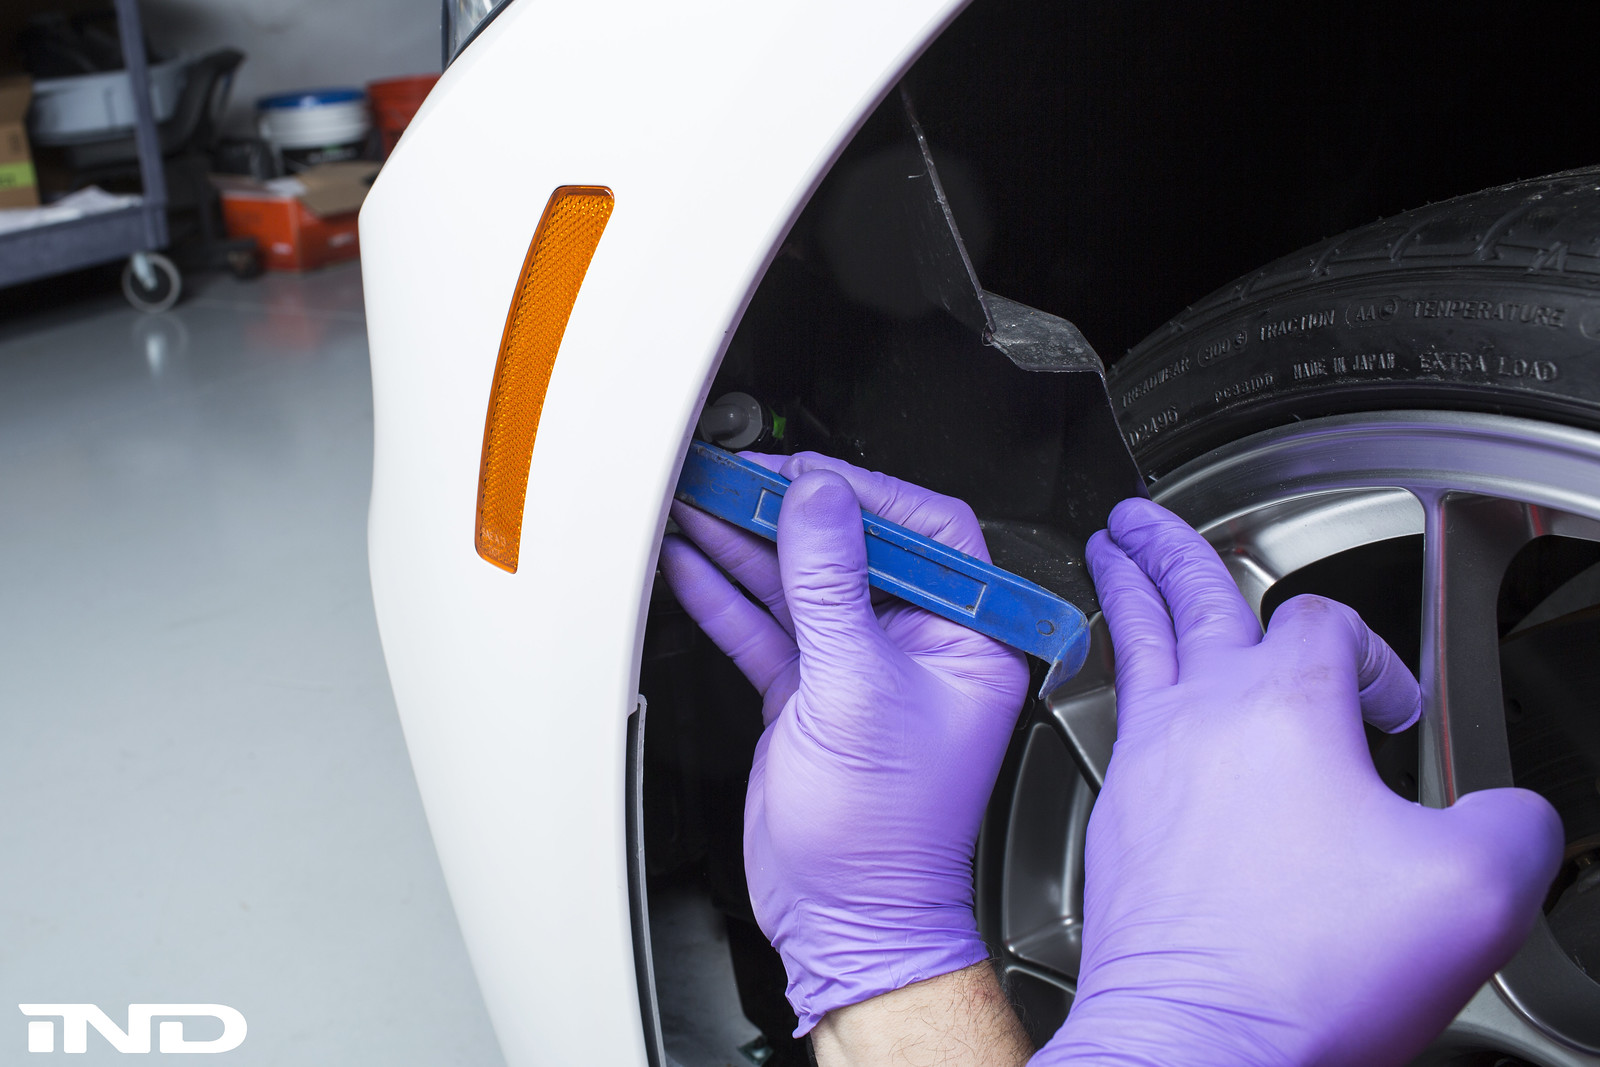
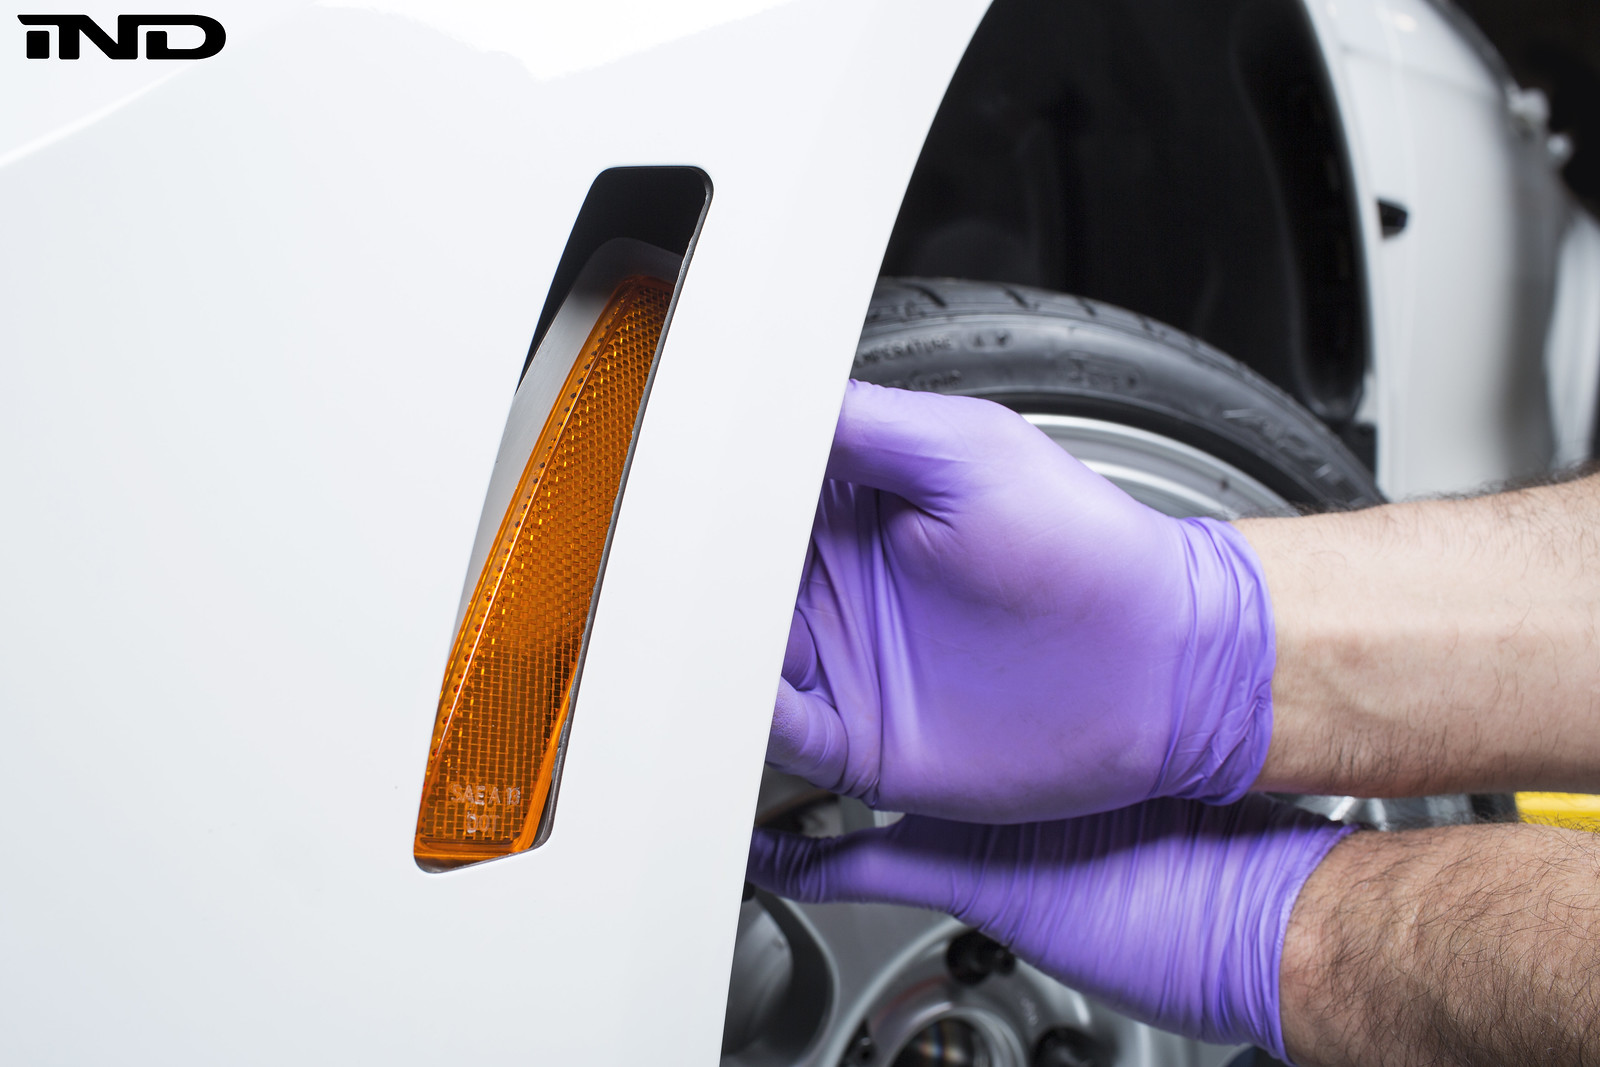
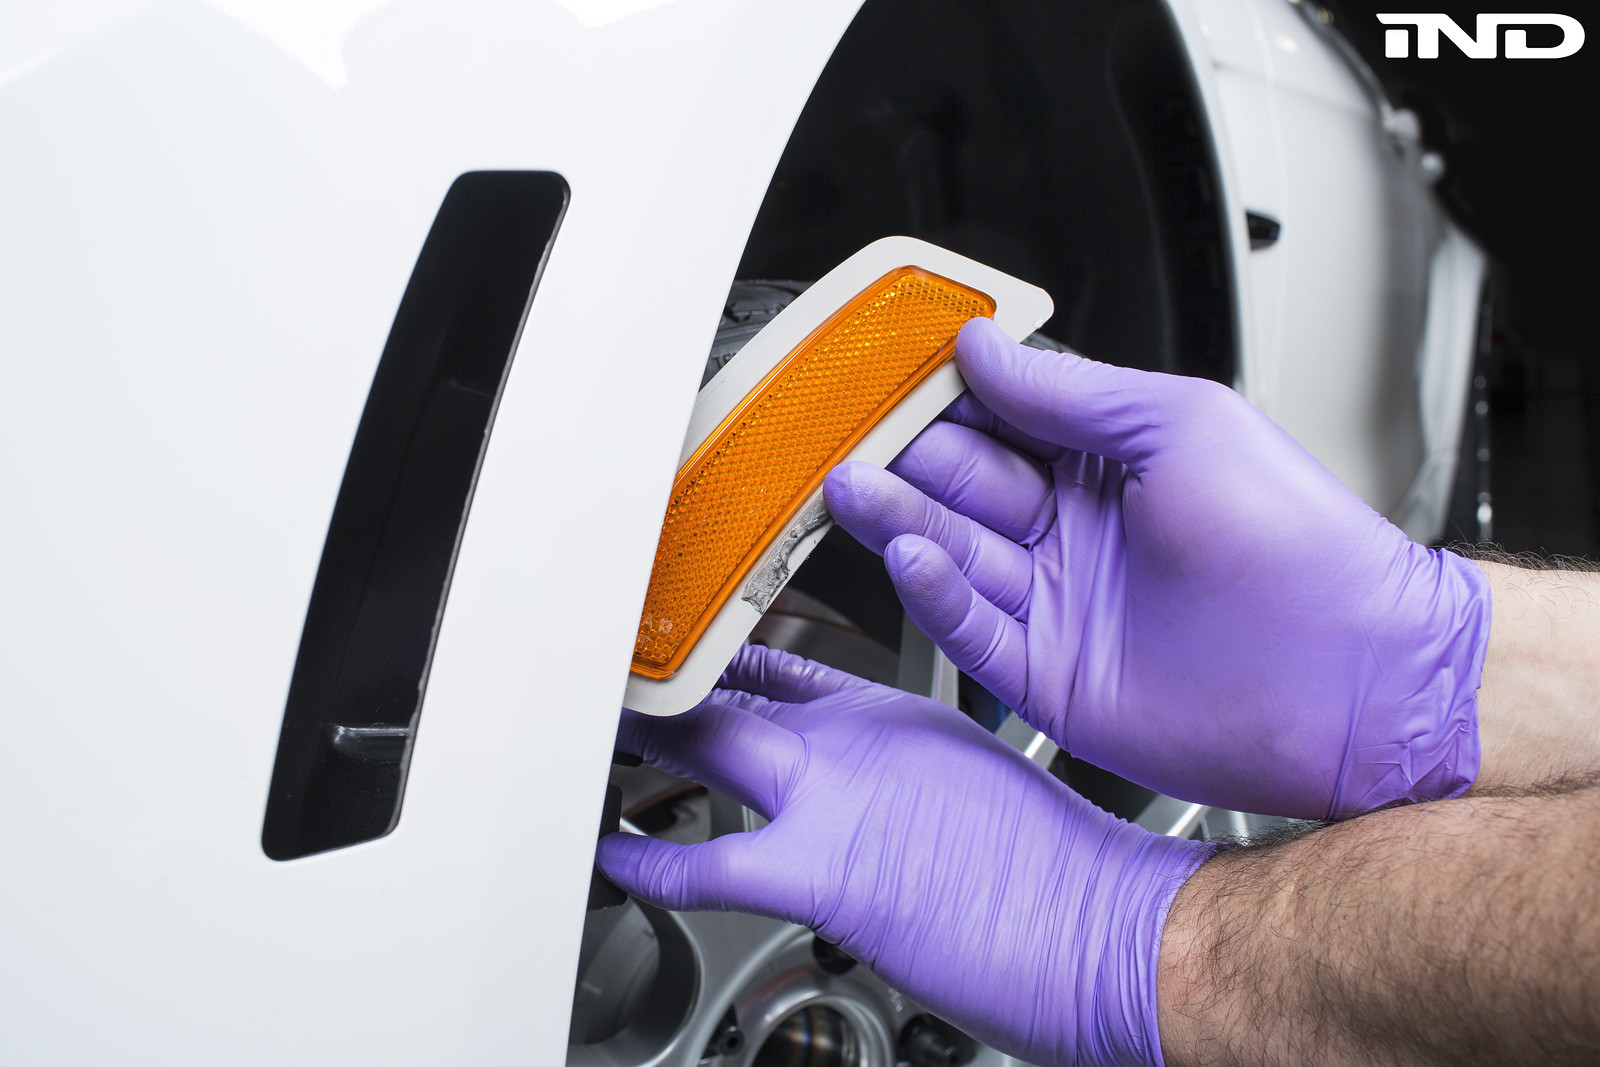
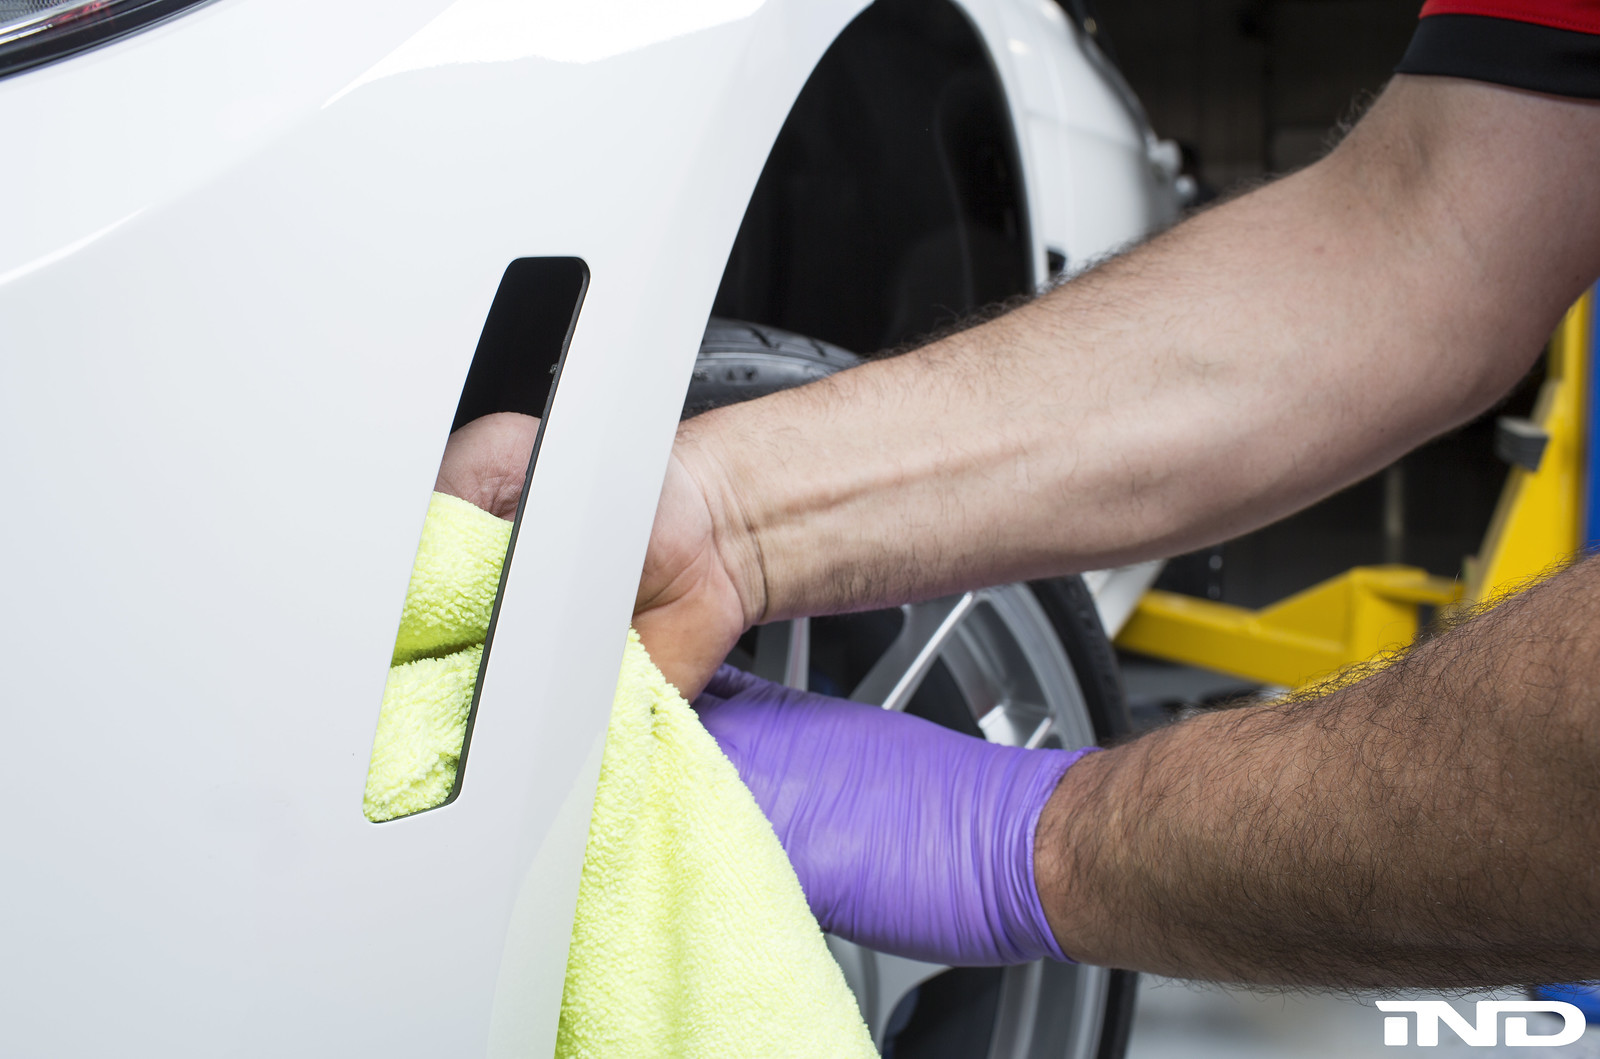
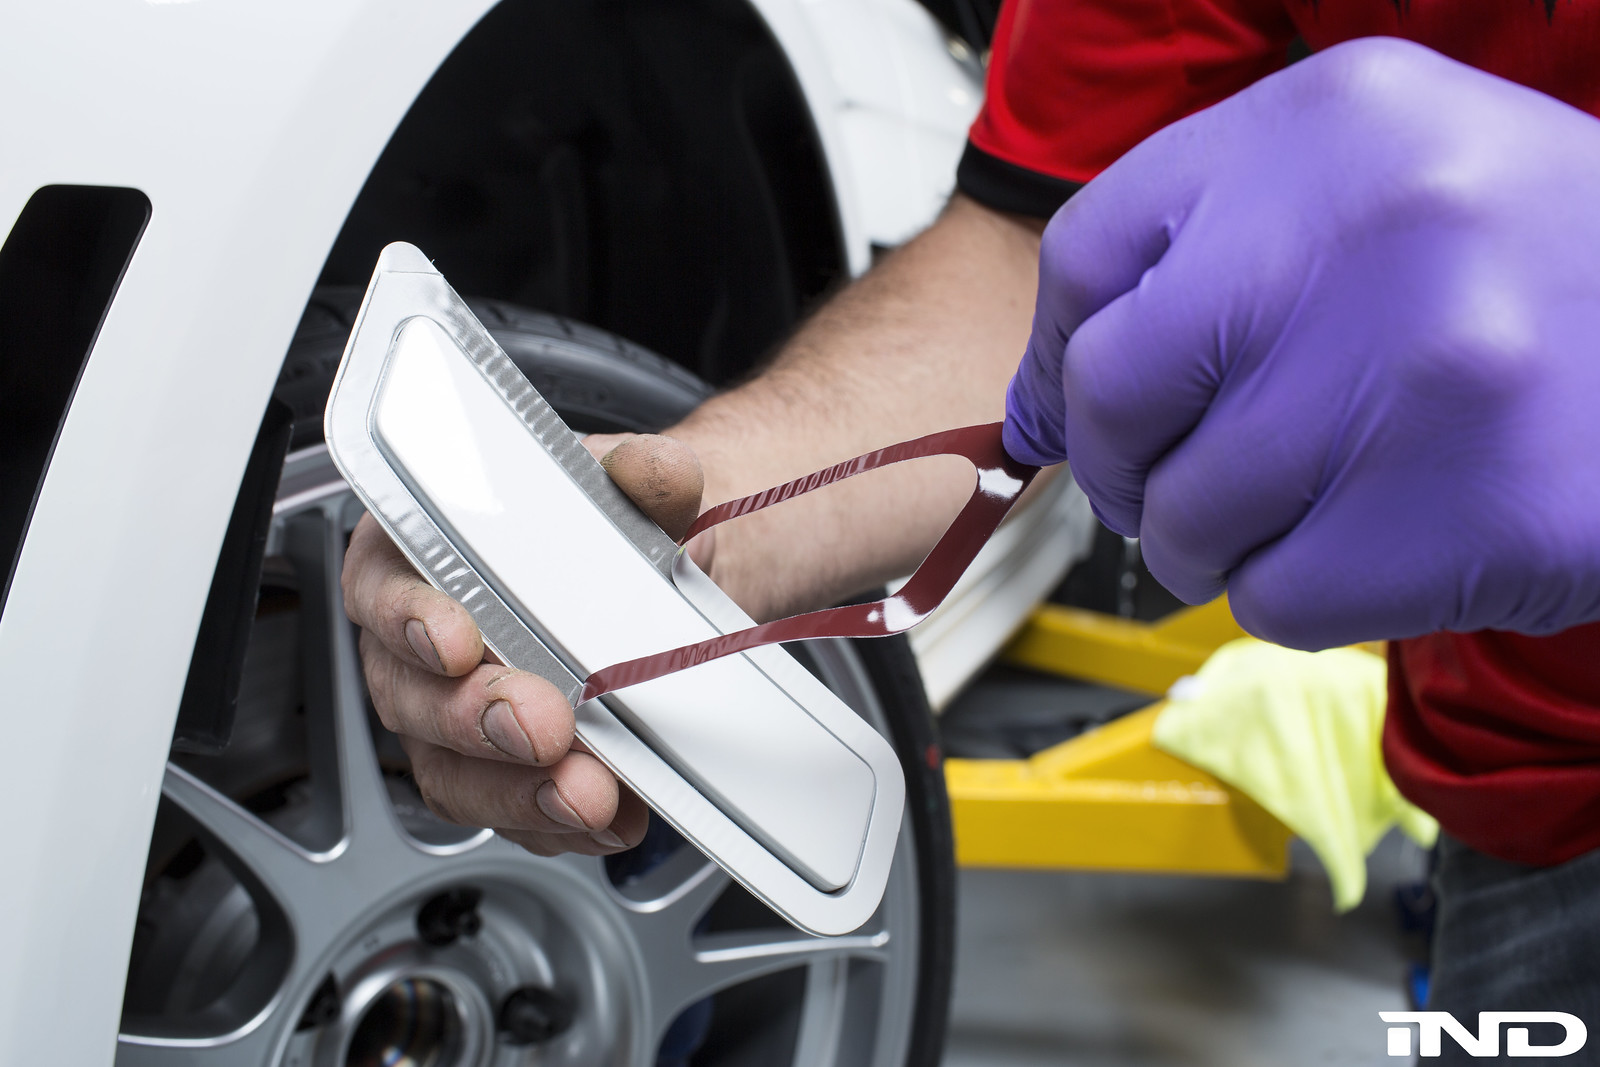
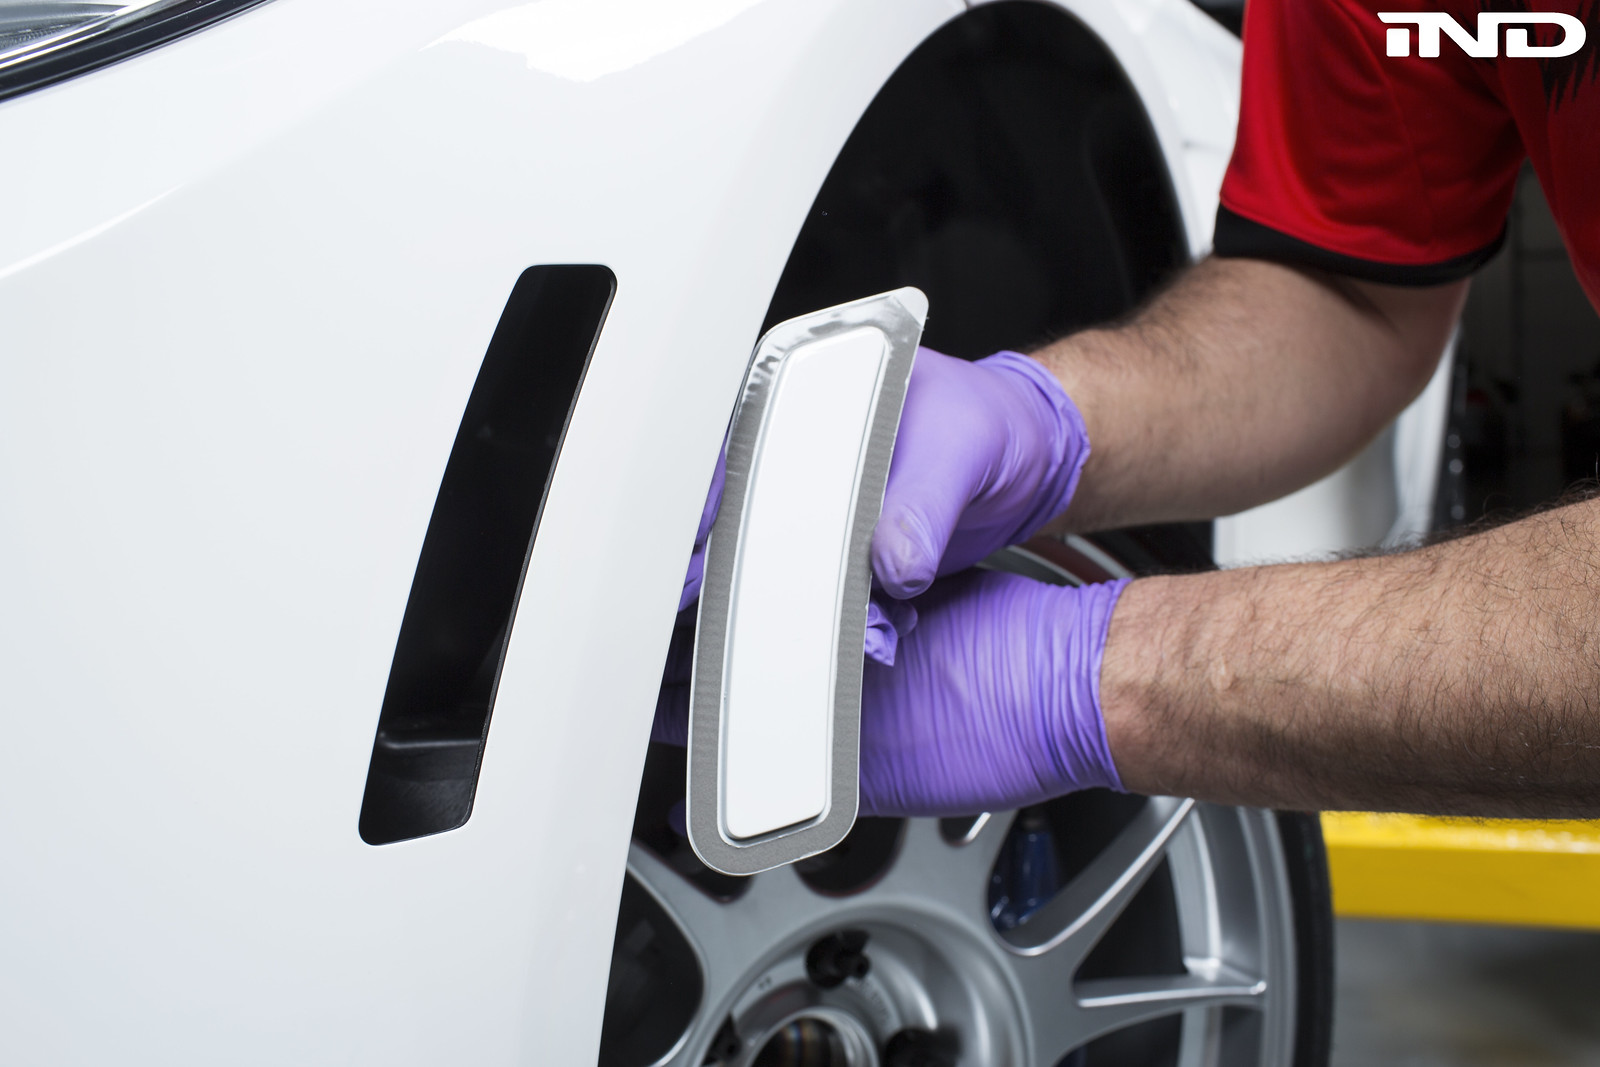
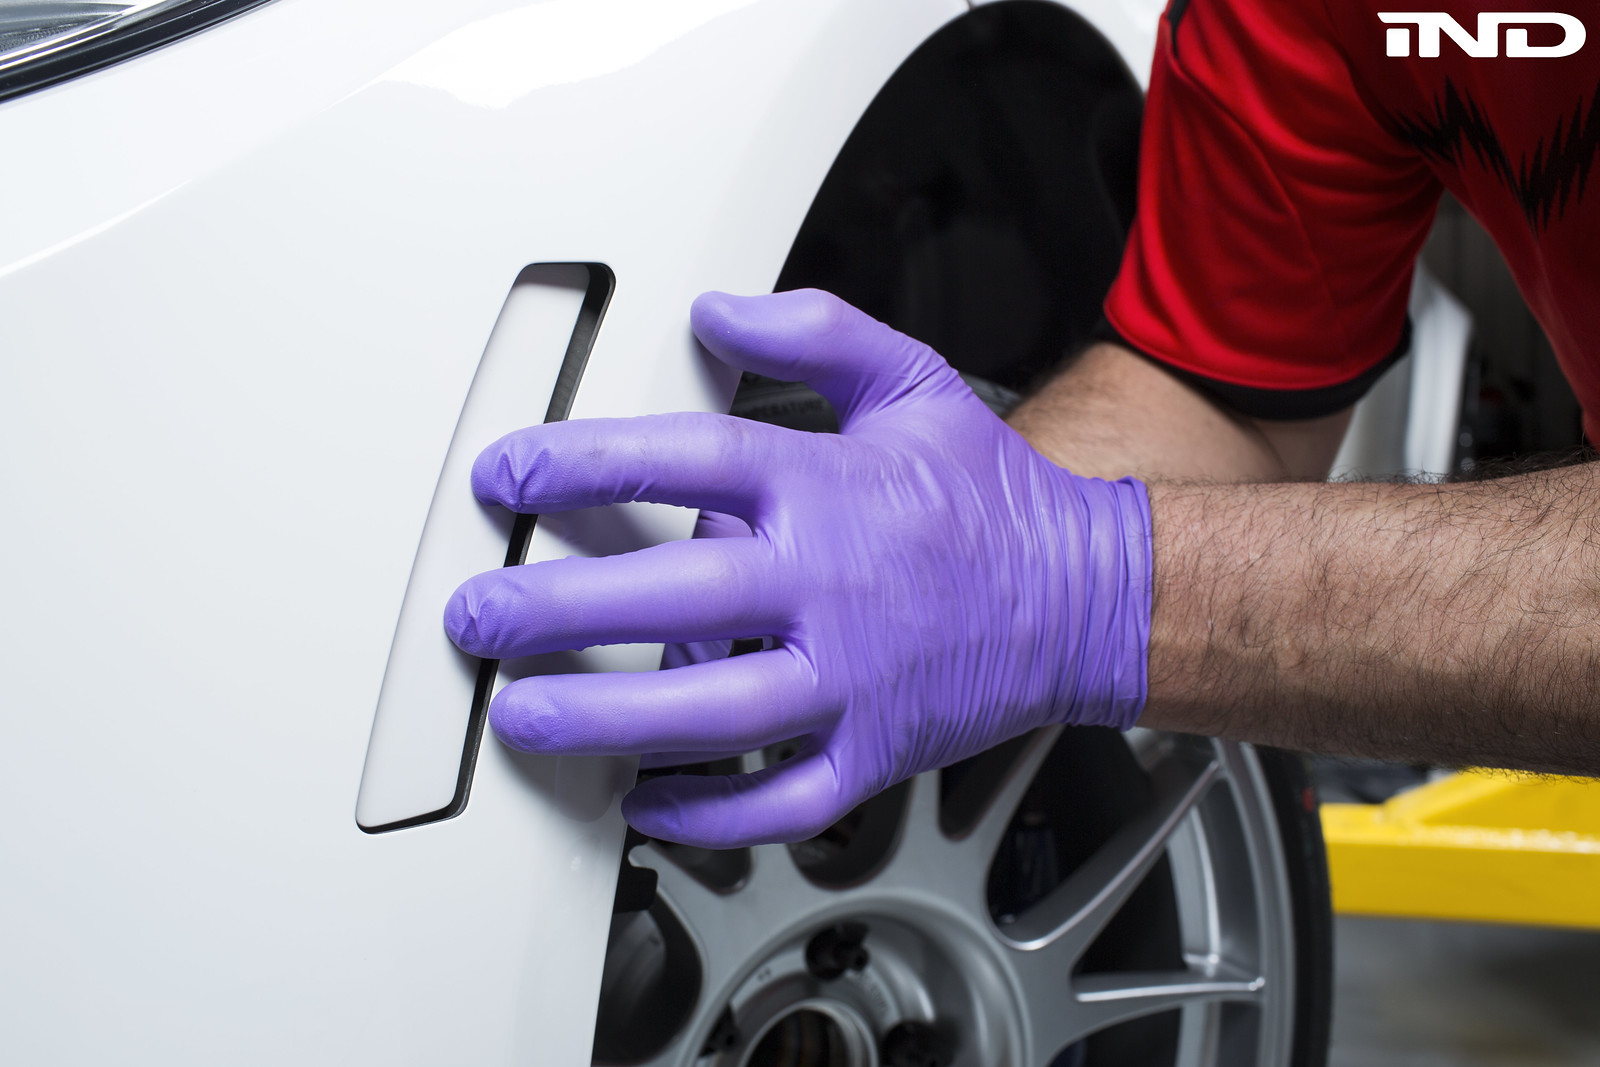
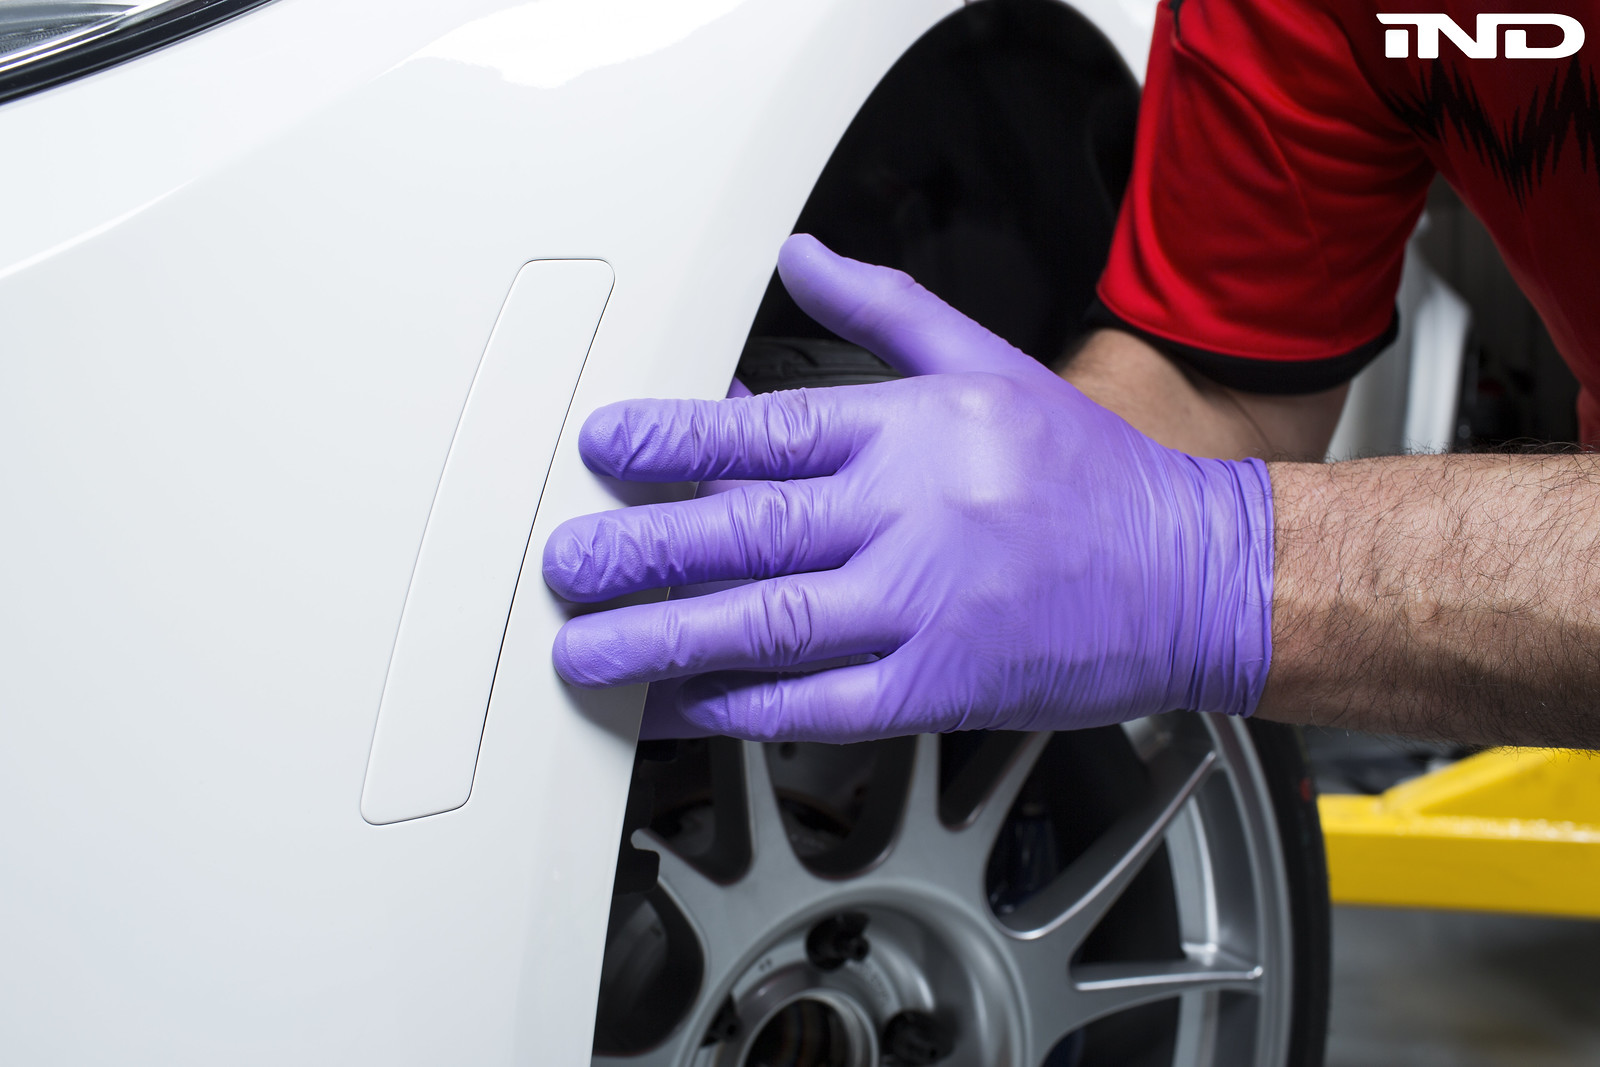
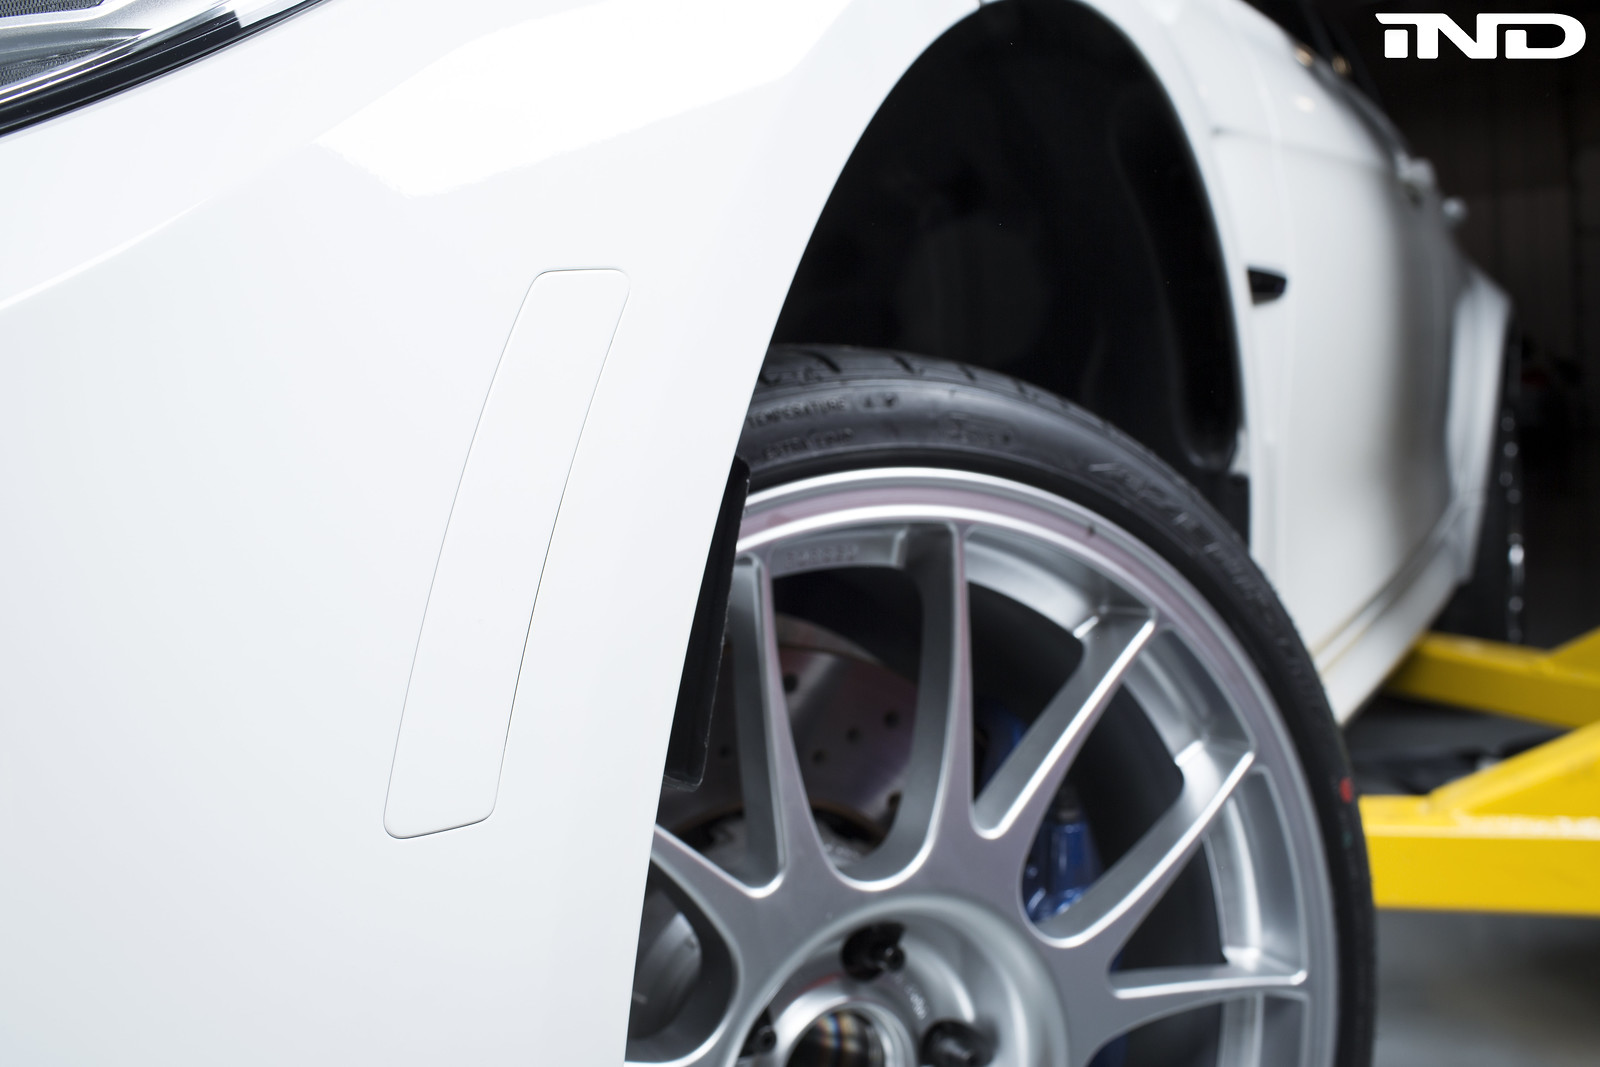
Last edited by Ryan@IND; 07-20-2017 at 01:31 PM..
Appreciate 11
      06-26-2014, 02:54 PM   #2
GOLFFRR
GOLFFRR's Avatar
10797
Rep
27,588
Posts

Drives: GOLFFRR cart
Join Date: Mar 2009
Location: we sell BMWs to "ALL" US states

iTrader: (4)

Awesome! Thank you
__________________

BEFORE YOU BUY YOUR NEXT BMW, EMAIL OUR GUY KOTE FIRST!
Kote M Sales:Kotem@bmwofcamarillo.com Cell:805-368-9101
vipfinance@bmwofcamarillo.com for warranties!
Appreciate 0
      06-26-2014, 06:41 PM   #3
TheRealOrosie
BMW Fan Boy
TheRealOrosie's Avatar
United_States
446
Rep
1,385
Posts

Drives: //M
Join Date: Apr 2010
Location: Chapel Hill, NC

iTrader: (0)

Very cool! First mod after my tint. Thanks!
Appreciate 0
      06-26-2014, 07:17 PM   #4
Sedan_Clan
Law Enforcer
Sedan_Clan's Avatar
Brazil
24981
Rep
22,266
Posts

Drives: '22 Chalk Gray Porsche C2S
Join Date: Jun 2006
Location: ..in your rearview!!!

iTrader: (26)

Does IND produce painted rear reflectors too?
Appreciate 0
      06-26-2014, 07:41 PM   #5
JDUni1
Lieutenant
JDUni1's Avatar
United_States
76
Rep
521
Posts

Drives: '15 M3, '12 135i (Sold)
Join Date: Sep 2011
Location: Tucson, AZ

iTrader: (0)

Quote:
Originally Posted by Sedan_Clan View Post
Does IND produce painted rear reflectors too?
They sure do! Have a set sitting in a box in my garage waiting on my car
__________________
2015 Alpine White ///M3 | Sakhir Orange/Black Extended Merino Leather | 6MT | Lighting Package | Harmon Kardon | H&R Sport Springs (F32) | iND Cosmetic Treatment | M Performance Spoiler | 19" HRE 301M Frozen Red| Mode Carbon Trophy R1 Diffuser
Appreciate 0
      06-26-2014, 07:47 PM   #6
Sedan_Clan
Law Enforcer
Sedan_Clan's Avatar
Brazil
24981
Rep
22,266
Posts

Drives: '22 Chalk Gray Porsche C2S
Join Date: Jun 2006
Location: ..in your rearview!!!

iTrader: (26)

Quote:
Originally Posted by JDUni1 View Post
They sure do! Have a set sitting in a box in my garage waiting on my car
I need a quote for front/rear reflectors in YMB. P/M me @Andrew@IND
Appreciate 0
      06-27-2014, 12:07 AM   #7
parky1215
Lieutenant Colonel
parky1215's Avatar
561
Rep
1,979
Posts

Drives: F90 M5C | G06 X6 M60i
Join Date: Nov 2010
Location: Rancho Cucamonga, CA

iTrader: (13)

Thanks so much for this diy guide.
Appreciate 0
      06-27-2014, 09:28 AM   #8
Ryan@IND
Ryan@IND's Avatar
United_States
1764
Rep
7,650
Posts

Drives: ACR
Join Date: Mar 2008
Location: Chicago

iTrader: (18)

Quote:
Originally Posted by Sedan_Clan View Post
I need a quote for front/rear reflectors in YMB. P/M me @Andrew@IND
PM sent

Quote:
Originally Posted by Sedan_Clan View Post
Does IND produce painted rear reflectors too?
Absolutely. They are listed on our site and we will have a DIY produced by Monday morning. Feel free to shoot me a private message with any further questions.

http://ind-distribution.com/ind/cate...ear-reflectors

Quote:
Originally Posted by parky1215 View Post
Thanks so much for this diy guide.
Our pleasure!
__________________
IND DISTRIBUTION | 866-963-4520 • INSTAGRAMFACEBOOKFLICKR
Appreciate 0
      06-27-2014, 09:42 AM   #9
Dundas
Private First Class
Canada
36
Rep
129
Posts

Drives: G82 xDrive BSM
Join Date: Jul 2007
Location: Hamilton, Canada

iTrader: (0)

What's the best solvent to use in Step 4?
__________________
'22 G82 xDrive BSM
'22 G80 xDrive BSM - Wife's
'15 F82 BSM - sold
'08 E92 M3 BSM - sold
'02 E46 M3 CB - sold
Appreciate 0
      06-27-2014, 09:52 AM   #10
Definitive
definitivecars.com
Definitive's Avatar
United_States
354
Rep
3,833
Posts

Drives: Elsa - 2015 F80 M3 - YMB/SS
Join Date: Aug 2006
Location: So Cal

iTrader: (3)

Garage List
Thanks IND! Fronts look pretty standard. Looking forward to your tips and tricks for the rears and side gills!!!

D
Appreciate 0
      06-27-2014, 11:12 AM   #11
Ryan@IND
Ryan@IND's Avatar
United_States
1764
Rep
7,650
Posts

Drives: ACR
Join Date: Mar 2008
Location: Chicago

iTrader: (18)

Quote:
Originally Posted by Dundas View Post
What's the best solvent to use in Step 4?
We use 3M general purpose adhesive remover and it works like a charm. All auto parts stores and most craft stores will have some iteration of the 3M adhesive remover.
__________________
IND DISTRIBUTION | 866-963-4520 • INSTAGRAMFACEBOOKFLICKR
Appreciate 0
      06-27-2014, 12:05 PM   #12
Sedan_Clan
Law Enforcer
Sedan_Clan's Avatar
Brazil
24981
Rep
22,266
Posts

Drives: '22 Chalk Gray Porsche C2S
Join Date: Jun 2006
Location: ..in your rearview!!!

iTrader: (26)

Quote:
Originally Posted by Andrew@IND View Post
PM sent


Absolutely. They are listed on our site and we will have a DIY produced by Monday morning. Feel free to shoot me a private message with any further questions.

http://ind-distribution.com/ind/cate...ear-reflectors


Our pleasure!

Thanks @Andrew@IND ....any photos of painted rear reflectors installed (..preferably in YMB)?
Appreciate 0
      06-27-2014, 03:22 PM   #13
Ryan@IND
Ryan@IND's Avatar
United_States
1764
Rep
7,650
Posts

Drives: ACR
Join Date: Mar 2008
Location: Chicago

iTrader: (18)

Quote:
Originally Posted by Sedan_Clan View Post
Thanks @Andrew@IND ....any photos of painted rear reflectors installed (..preferably in YMB)?
Photographer is editing the photos as we speak and yes they are Yas Marina
__________________
IND DISTRIBUTION | 866-963-4520 • INSTAGRAMFACEBOOKFLICKR
Appreciate 0
      06-27-2014, 03:23 PM   #14
Sedan_Clan
Law Enforcer
Sedan_Clan's Avatar
Brazil
24981
Rep
22,266
Posts

Drives: '22 Chalk Gray Porsche C2S
Join Date: Jun 2006
Location: ..in your rearview!!!

iTrader: (26)

Quote:
Originally Posted by Andrew@IND View Post
Photographer is editing the photos as we speak and yes they are Yas Marina
I caught a glimpse on the IND IG page, so I can't wait to see the edited photos.
Appreciate 0
      07-07-2014, 05:08 PM   #15
Ryan@IND
Ryan@IND's Avatar
United_States
1764
Rep
7,650
Posts

Drives: ACR
Join Date: Mar 2008
Location: Chicago

iTrader: (18)

DIY Reflector Video

__________________
IND DISTRIBUTION | 866-963-4520 • INSTAGRAMFACEBOOKFLICKR
Appreciate 0
      07-14-2014, 12:30 PM   #16
filip75
Facetious
filip75's Avatar
United_States
109
Rep
530
Posts

Drives: '15 AW M4
Join Date: Nov 2013
Location: San Antonio, TX

iTrader: (0)

Awesome. I was wondering about the process.
__________________
Current: '15 BMW M4 (6MT), '08 HD Dyna Street Bob
Previous: '06 BMW 330Ci; '06 Mercedes CLK-350; '04 Acura TL A-Spec; '95 BMW 318ti; '92 Mercury Cougar; '94 Honda Accord
Appreciate 0
      07-15-2014, 04:48 AM   #17
savaho
Second Lieutenant
savaho's Avatar
United_States
39
Rep
216
Posts

Drives: M3
Join Date: Dec 2010
Location: NorCal

iTrader: (0)

Do you guys carry the clear reflectors?
Appreciate 0
      07-15-2014, 10:50 AM   #18
redfox
INSTAGRAM: @yaasplease
redfox's Avatar
Canada
166
Rep
1,023
Posts

Drives: 2015 YMB M4
Join Date: Mar 2010
Location: Toronto

iTrader: (4)

Another tip for everyone here on removing the front reflectors. Use an old/expired credit card (or something similar) to break apart the double sided tap. Starting from the topside is the best.
__________________
2015 ///M4: M/Vorsteiner Aero, P3Cars, HRE R101, Dinan S2, Coils & Intake; Eis/Akra Exhaust
2013 WRX Hatchback: LED Conversion, Blacked Out, Rally Armor
2015 Macan Turbo: Techart Exhaust, Cargraphics Lowering Module, Blacked Out
Appreciate 1
      07-15-2014, 03:46 PM   #19
c3r2z8f30i
Private First Class
c3r2z8f30i's Avatar
43
Rep
174
Posts

Drives: 2020 540ix & 2021 x5 40i
Join Date: Aug 2012
Location: Chicago, IL

iTrader: (0)

Quote:
Originally Posted by Andrew@IND
Painted reflectors are among the first additions made by any owner of a modern BMW. The unsightly orange reflectors installed in cars bound for North America instantly break the smooth lines of BMW bumpers.

IND provides painted reflectors as a cost effective solution relative to the purchase of a OEM European bumper. We start the process using the OE BMW reflectors for a factory fit, and the same paint process we would use to spray an entire car. Each reflector is sanded, prepped for paint, primed, then painted. We ensure that all lettering on the face of the reflector is completely removed providing the same finish as your factory bumper.


Many enthusiasts enjoy installing their own painted reflectors, so weve created this installation DIY to help.

Tools needed:

8mm socket and ratchet
Adhesive remover or cleaning solvent
Nylon prybar (optional)

Step 1:

First, turn the steering wheel to full lock, in any direction. This will expose the fender liner.

Step 2:

With the fender liner exposed, begin removing the 8mm screws near the front reflectors.

Step 3:

Once the fender liner screws are removed you will have access to the back of the bumper cover. Using your hands or a nylon prybar pull the edge of the reflector from the bumper cover. This may take some work to remove, but the leverage applied by a nylon prybar makes the job much easier.

Step 4:

After the reflector is removed from the bumper cover take a cloth and some adhesive remover or solvent and remove the excess adhesive.

Step 5:

Now that the surface is clean remove the adhesive cover on the painted reflector and push reflector in place. Make sure to apply even pressure around all edges.

Step 6:

With the reflector installed it is time to button her up. Pllace the fender liner back into position and secure it to the bumper with the 8mm screws.


It helps to us a hair dryer before removing it with a tool. Make sure it not too hot or you can fck up the paint.
Appreciate 0
      07-17-2014, 03:53 PM   #20
Ryan@IND
Ryan@IND's Avatar
United_States
1764
Rep
7,650
Posts

Drives: ACR
Join Date: Mar 2008
Location: Chicago

iTrader: (18)

Quote:
Originally Posted by c3r2z8f30i View Post
It helps to us a hair dryer before removing it with a tool. Make sure it not too hot or you can fck up the paint.
Correct, that is a big help if the adhesive is being stubborn. Fortunately, with newer vehicles they are usually a little easier s the adhesive has not been sitting for too long. Thanks for the input. We will add this to the top.
__________________
IND DISTRIBUTION | 866-963-4520 • INSTAGRAMFACEBOOKFLICKR
Appreciate 0
      07-19-2014, 11:29 AM   #21
c3r2z8f30i
Private First Class
c3r2z8f30i's Avatar
43
Rep
174
Posts

Drives: 2020 540ix & 2021 x5 40i
Join Date: Aug 2012
Location: Chicago, IL

iTrader: (0)

Quote:
Originally Posted by Andrew@IND
Quote:
Originally Posted by c3r2z8f30i View Post
It helps to us a hair dryer before removing it with a tool. Make sure it not too hot or you can fck up the paint.
Correct, that is a big help if the adhesive is being stubborn. Fortunately, with newer vehicles they are usually a little easier s the adhesive has not been sitting for too long. Thanks for the input. We will add this to the top.
Sure
Appreciate 0
      07-20-2014, 09:00 AM   #22
DreF80///M3
Private
11
Rep
76
Posts

Drives: BMW M3 (F80)
Join Date: May 2012
Location: Florida

iTrader: (0)

I installed my mineral white reflectors yesterday and the paint color is totally off. Is there anything I can do to make them match more closely? The car has been out in the sun, but not enough to dull in comparison to the reflector.
Appreciate 0
Post Reply

Bookmarks


Posting Rules
You may not post new threads
You may not post replies
You may not post attachments
You may not edit your posts

BB code is On
Smilies are On
[IMG] code is On
HTML code is Off


All times are GMT -5. The time now is 06:41 AM.


f80post
Powered by vBulletin® Version 3.8.11
Copyright ©2000 - 2024, vBulletin Solutions Inc.
1Addicts.com, BIMMERPOST.com, E90Post.com, F30Post.com, M3Post.com, ZPost.com, 5Post.com, 6Post.com, 7Post.com, XBimmers.com logo and trademark are properties of BIMMERPOST