2016 M4 63k miles.
So the other night just cruising home and got a top up coolant pop up on the display and I looked back and sure enough some white smoke behind the car. Managed to cruise it home quickly, any coolant added drained right out. Pulled the air box and can see the water pump belt is loose and when adding coolant to the expansion tank it drains right out of what looks like a small tube behind the water pump pulley presumably from the weep hole.
Just wanted to ask for any info and tips if anyone has tackled the waterpump. I dont see any threads that I can find or YouTube videos etc. I ordered a new waterpump, both belts and a thermostat. Im
Not familiar with the crimp style clamps bmw uses on the water pump hoses so assuming Ill be replacing those with traditional hose clamps?
Also just curious about the fan .. does it drop down from below or pulled up from the top ?
Ill be taking pics and will update into a new post with pics and videos as it seems many have already messaged me on Fb asking me to do so as they cant find much on the topic either.
Any help /tips/ info is appreciated !

*** UPDATE !!! ***
So it was the waterpump. The bearing and all its pieces and rollers fell out and a few were jammed and some pieces could be heard inside the pump. The weep hole was dripping straight down onto the belt which spits it up everywhere underhood.
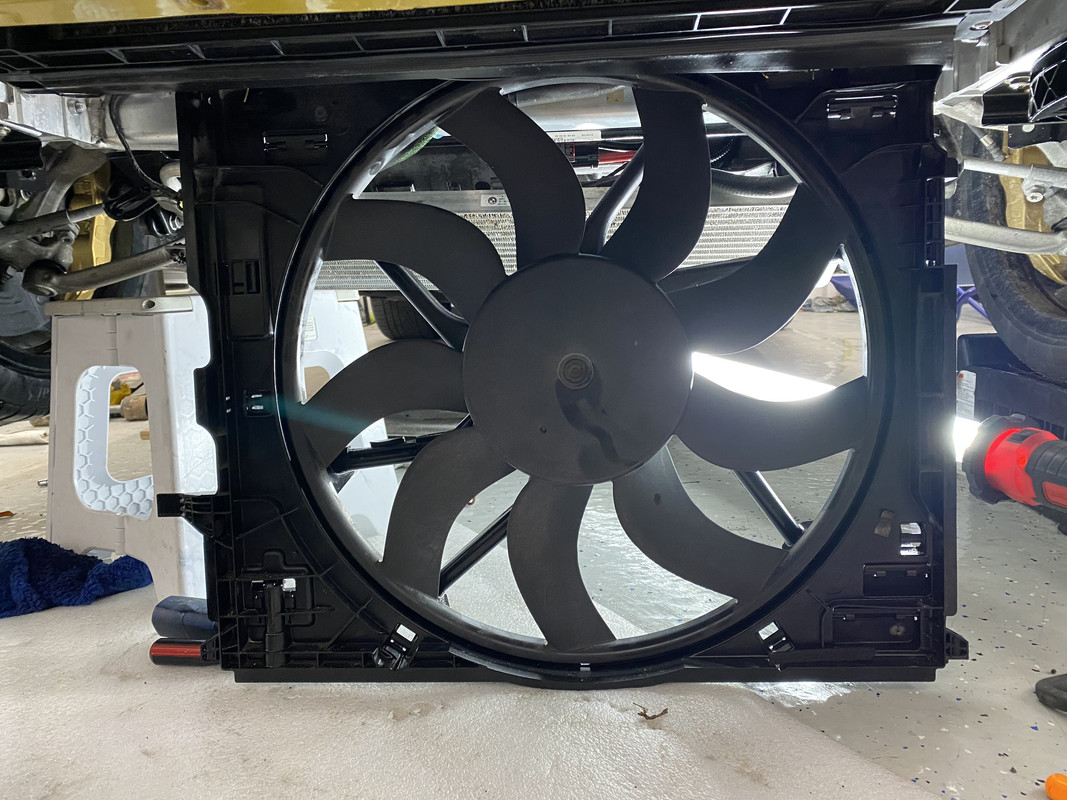
The install was quite easy. I took my time and chose to remove the radiator fan from below. Mostly just to familiarize myself with this motor and to make room to do the crank bolt capture plate while in there.
I chose to replace the waterpump , thermostat and both belts all together.
Heres some pics :
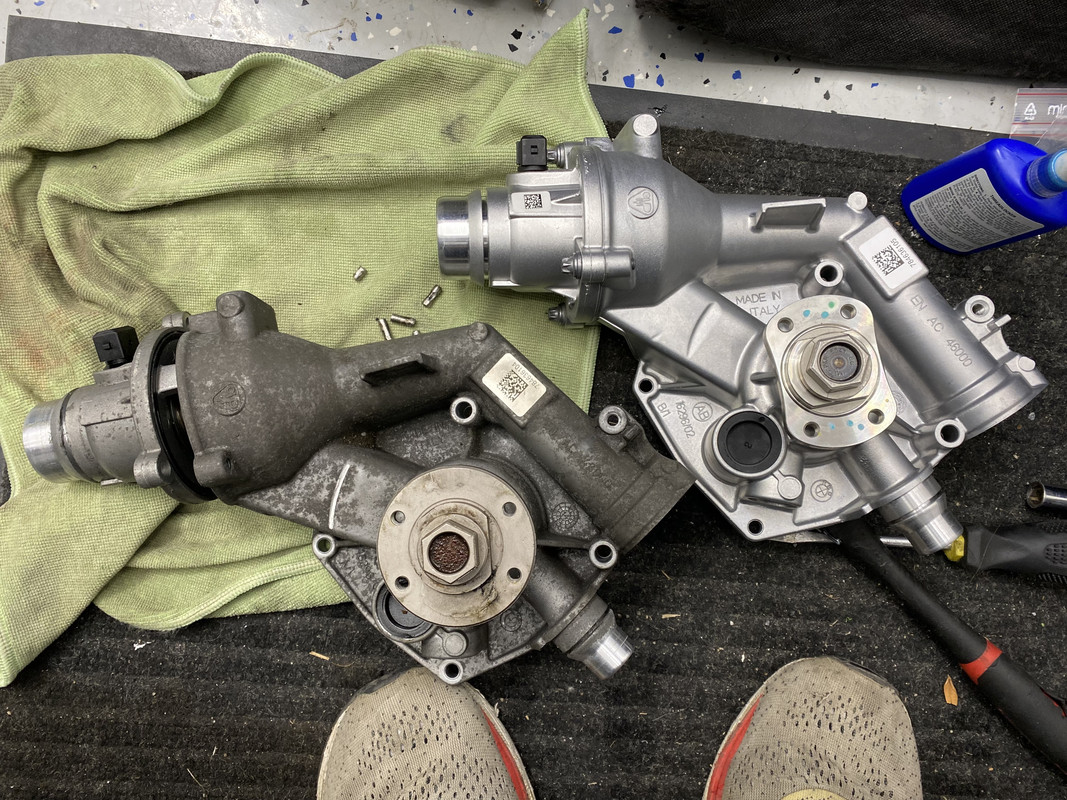
New pump and thermostat which is a one piece with the housing and has a sensor inside as well. I usually look to drill a tiny hole in the thermostat to aid in bleeding but there is a hole and in the design there is a sensor in that spot so I didnt want to add any holes and mess with the sensor and possibly trigger any codes because of the change.

Dropped the oil cooler and it was cluttered up so for a chance to clean it up.

Pic of the pump with the fan in place, can see the wobbly pulley. I believe there is sufficient space to change the pump out without removing the fan but I chose to remove it.

Again Im not sure I just go as I see and it looked like the fan would come out best below which it did. Just had to remove a plastic deflector shield, the ewp bracket and the pump. I believe the charge cooler pump could have been left connected and moved to the side but I chose to remove it and drained out the coolant from the passenger side front radiator located in the lower bumper.
Ewp which I believe is for the charge cooler side of the cooling system.

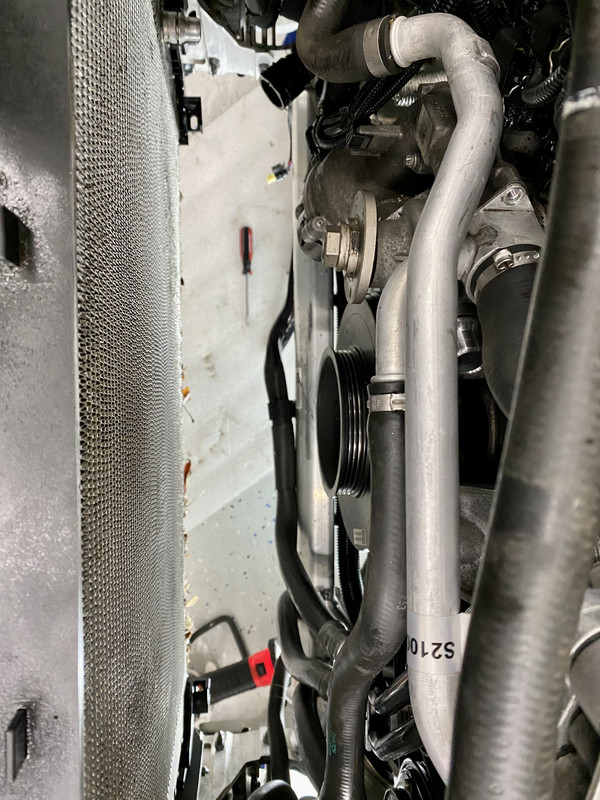
With the rad fan out.. the view from top. Plenty of space to work. I also chose to remove the forward turbo I let pipe which was very easy from underneath.
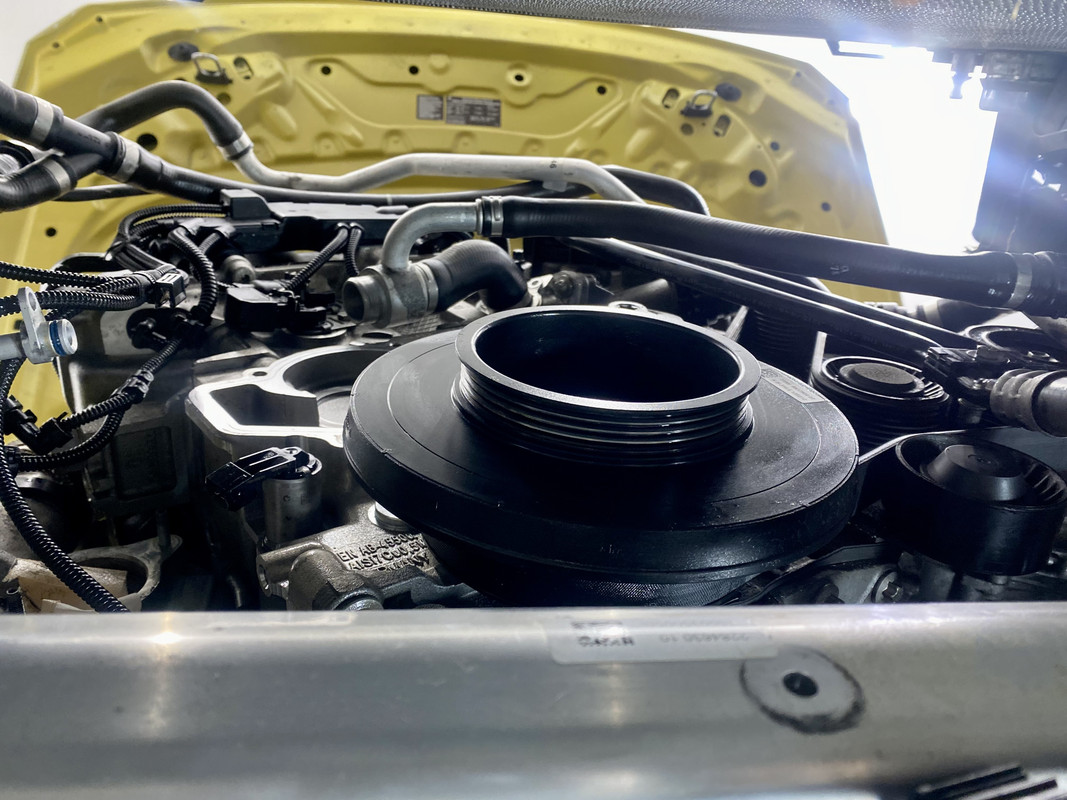
Pump pulley removed. Had to pick up snap ring pliers and file them down to get the snap ring out. Didnt have to remove any tension with the belt as the bearing was so destroyed and there was so much play it had no tension already. Just 4 screws and the snap ring and it comes off.

Water pump is easily removed. Screws are different lengths so i punched them into some cardboard to remember which went where. Just remove clips from hoses and remove as well as a screw for the hard lines which I think go to cool the turbos. I left the thermostat attached and removed the hose from the radiator and pulled it out together.

View of the space from below. At this point I stopped for 5 mins and just installed the crank bolt capture which took 5-10 minutes.
Capture plate installed. Left the belt on so the tension would help keep everything in place and it didnt move a mm.

Old and new pump
Water pump pulley has an elongated hole so it can slide to increase or reduce tension. Quite interesting design and was easy to work with. I dug up some instructions that said to turn the main crank bolt.. but with the cbc theres no bolt to turn so I just put the belt on and turned the giant nut right on the end of the pulley and it pulled the tension on the belt and slides the pulley over to its correct position. When it reaches this position with belt tension the 4 holes for the pulley bolts line up and I torqued those in. Very simple.

Just finishing the bleeding process.. fires up nice and smooth and quiet and cant wait to start driving it again ! Such a lovely car to work on
