I suffered through this VTT CBC install this weekend on my '16 M3, and I made a few huge mistakes that made the job much worse than it should have been, so I'd like to share my experience and publicly embarrass myself by revealing what a terrible DIY mechanic I am to potentially save others from my misery.
First off, huge thanks to OP Rotzy for writing this comprehensive install guide and taking all the pictures (with fasteners and clips circled... SO HELPFUL).
Minor details: In steps 1/2, I did not unplug the sensor on the intake tube, as I've in the past managed to break connectors by unplugging them, so I after all the other fasteners and clips on the intake tube were removed, I just flipped it upside-down and laid it on top of the engine cover (the wire to the sensor is long enough to do that). I also didn't remove the engine cover.
I opted to drop the fan shroud down to install the CBC; I tried lifting it up, but I couldn't get as much access to the crank pulley area working from the bottom as I wanted.
Dropping the fan shroud down was frustrating. I have plenty of experience in DIY wrenching on cars, so I'm definitely not a noob to this kind of work, but man, the sharp/hard edges of the FRP shroud biting into your hands and the shroud running into EVERYTHING IN EVERY DIRECTION as you try to manuever it really tries your patience. Even when you have a good idea of what needs to be shifted/flex/bent which way because of Rotzy's outstanding DIY. Just be mentally prepared for this. SERENITY NOW!!!
I ended up having to remove the two star bolts that hold up the plastic support frame that secures the transmission oil cooler (the not-very-tall but full-width heat exchanger) and moved that down to get clearance for the driver's side bottom mounting tab of the fan shroud to move downward.
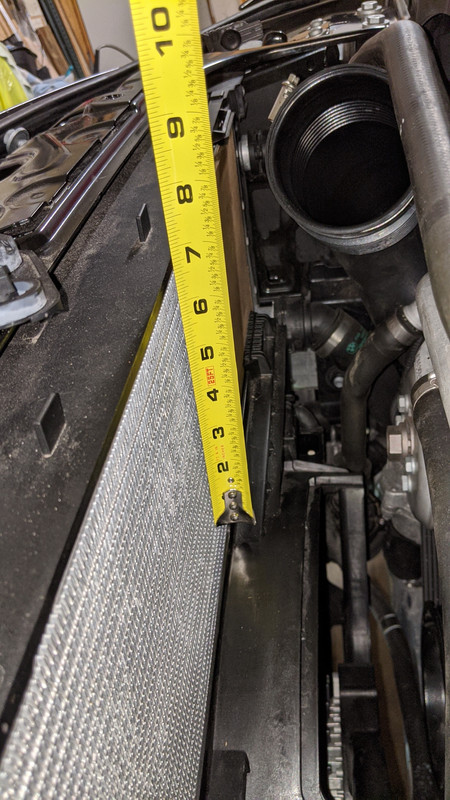
I moved the fan shroud down a lot to get good clearance/access from above... you can see in my pics how far I dropped it (about 6 3/4" down, measuring the top of the fan shroud to the top of the radiator):

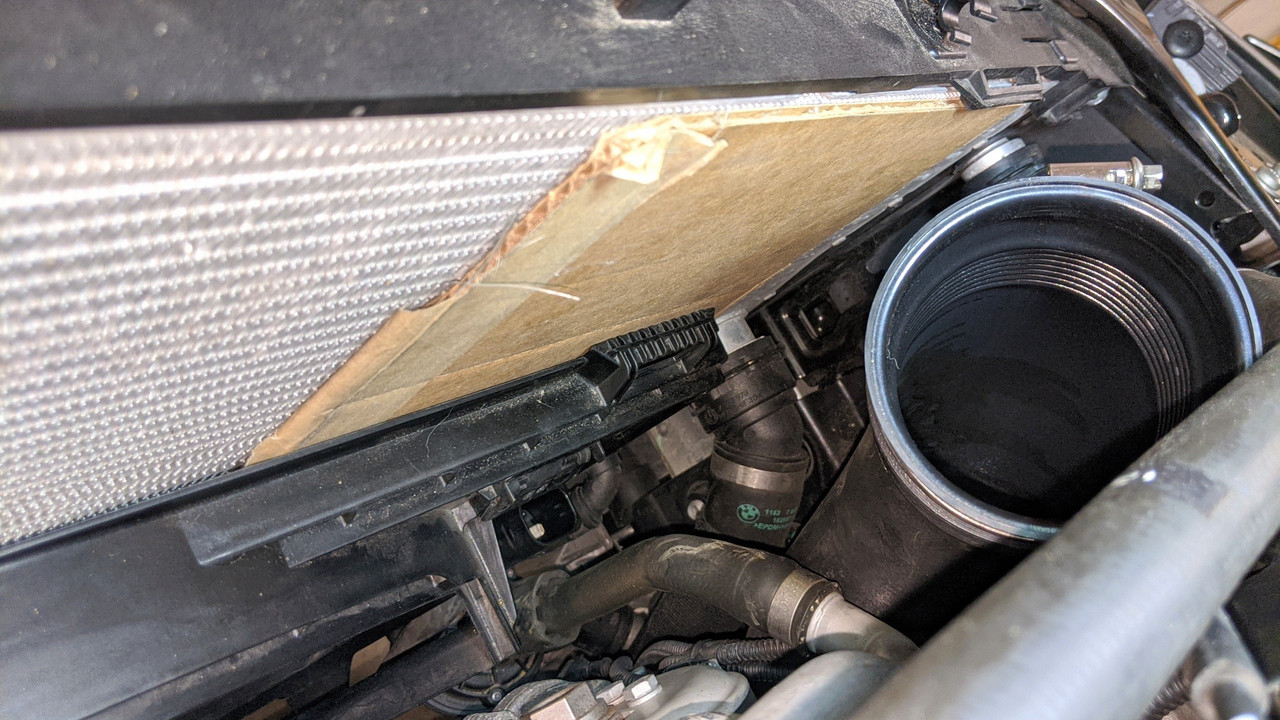
BUT, before you start moving the fan shroud down, you should get a large piece of corrogated cardboard and slip it between the radiator and the passenger-side of the fan shroud to prevent the radiator fins from being smooshed by the passenger-side top hanger "hook" of the fan shroud. I didn't think to do this until *after* I saw I was deforming the radiator fins.
I read on
page 4 of this thread where weytie offered this suggestion:
As some people stated the pulley came lose when extracting all the 8 bolts. To prevent this i cut the head of of 2 regular M8 bolts
In this way i could extract the bolts from the pulley and put the 2 cutted bolts on the pulley. Like this the pulley can't shift or fall of.
Then you can just slide the cbc over the cutted bolts and put the rest of the bolts in.At last you take the 2 cutted bolts out and put the new ones in.
So, this seemed like a really smart idea to prevent the pulley from coming loose/shifting position. Logically, it's better to take steps to prevent the pulley from moving than to have to deal with repositioning it, right? Unfortunately, it didn't work for methe pulley still came looseand then the studs caused extra problems/headaches. Read on for why, OR you can just skip the next two paragraphs and get to what I eventually had to do and what I recommend instead.
The issue (for me; obviously it worked just fine for weytie and this individual definitely gets credit for thinking of using the temporary locating studs) was that even with two 8 x 1.25 studs inserted in place of the OEM bolts to secure the pulley's location rotationally (i.e., as the hands on a clock move) the pulley still shifted OUTWARDS, away from the engine and toward the radiator, and with the tension on it from the serpentine belt, it immediately got cockeyed and jammed the pulley against the two studs... which I threaded in so easily with my fingertips, before the pulley moved, I didn't think I needed any way to remove them with tools. I should have taken an extra three minutes to cut a slot into the ends with a cutoff wheel, so I could use a stubby flatblade screwdriver to back them out.
Because of the studs not extending beyond the pulley very far, I couldn't get a grip on the studs to use pliers to back them out. You can't see what you're doing, and there's really no way to hold a mirror while trying to also grab the stud ends with pliers... in any case, I ended up having to use Loctite red (permanent) to screw on two nuts to the ends of the studs, then waited a full 12 hours until the next day for the thread locker to cure, and then removed the studs by using the nuts to back them out with a ratchet wrench.
WHAT I RECOMMEND INSTEAD OF USING TEMPORARY STUDS
What I should have done is applied
this tip from LRGM3 on page 3 of this thread:
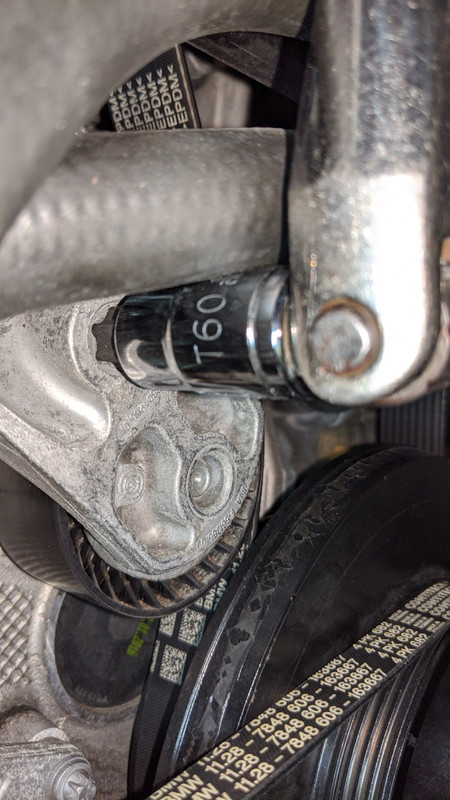
1) if the crank pulley moves (which mine did) just put a torx bit in the tensioner with a ratchet on it, then wedge it with a pipe on the end towards the intake to hold the belt loose (made it easy to work on after that)
If I'd read this and understood it, I could have easily removed the stuck studs without the permanent loctiting-nuts solution... by using the built-in T60 female torx/star recess in the serpentine belt tensioner arm, you can release all of the tension on the belt, allowing easy repositioning of the pulley. What's not as easy is figuring out a way to secure the 1/2" breaker bar or ratchet wrench in position (needs to be rotated about 30° clockwise) so you can work on the pulley/CBC install with two hands, when you're working by yourself... if you have a helper, than you can just have that person hold the tensioner loose for 45 seconds or however long it takes you to properly position the pulley, the CBC, and then get at least ONE of the VTT-supplied allen-headed bolts threaded in finger-tight, so the pulley can't shift outwards and away from the crank snout.
I think the best strategy is to assume that the pulley will slip/move on you, and to be prepared to use the T60 male star socket + breaker bar technique to release the serpentine belt tension to reposition it... using studs to try to prevent movement didn't work for me, as the pulley slipped outward and then I had to resort to releasing the tensioner anyway to correct the situation.
 LAST TIP: DON'T MAKE THIS INCREDIBLY DUMB MISTAKE THAT I'M SUPER-EMBARRASSED TO ADMIT I MADE MYSELF
There's 8 bolts that go into the CBC/OEM crank pulley. Make sure you actually install all eight hex-head bolts/SS washers and torque them all properly BEFORE reinstalling the fan shroud!
Yes, I actually managed to install only SEVEN of the new CBC bolts before getting halfway through reinstalling the fan shroud... and then realizing I'd missed one bolt.
This happened mostly because I'm an idiot and was hurrying and trying to wrap up the job ASAP (as I was a full day behind schedule). BUT, it also occurred because you can't directly see what you're doing (you have to either use your phone on video mode with the flash on, as an "electronic periscope"; or you have to use a mirror tool)... this goes for when you're moving the torque wrench around and torquing each bolt. I couldn't really tell just by feel that there was a bolt head missing... and I didn't think to confirm visually before I started on the shroud reinstallation.
How did I not see the leftover, uninstalled bolt, you ask?? I had put all eight bolts/washers grouped together on my workbench, but one of them rolled away from the group and got partially hidden under another random part that was sitting on the bench... so I installed 7 bolts, looked quickly at my bench and saw no more bolts, and assumed I had installed all of them.
It was a perfect storm of idiocy. DON'T BE AN IDIOT LIKE ME!!!