

| 11-18-2018, 09:33 PM | #1 |
|
First Lieutenant
 59
Rep 398
Posts |
Blackvue 900DS dashcam + cellink neo on F80
Hi guys, just installed this setup on my F80.
My brother's M2 was recently a victim of hit and run, and also my own M3 got hit whilst I was unloading the boot and the bastard tried to drive away!!! So I think this is essential especially if you park in public places from time to time. Thought this post might be of interest to some as it took me a while to collate all the info about what to use, how to install etc. Hardware: Blackvue 900DS 2ch front and rear (autobarn ~$530 when they had 30% off and ebay 5% extra) Samsung pro endurance micro SD 128gb (~$70 price matched at Officeworks to some online shop I-tech) Cellink neo battery (~$330 dashcamsaustralia) A few notes about the install: I installed it myself, took about 2 hours and I like this sort of stuff. It is not that hard and it would be pretty hard to break something doing this! I decided to use Cellink neo battery as this means the dashcam is not wired to use the car's OEM battery for parking mode. The Cellink charges whilst driving from the fusebox, and then powers the dashcam when the car is off for parking mode. It lasts about 18 hours on parking mode from a full charge. Full charge time for the Cellink is about 40 minutes. There is an app that you can connect to the battery via bluetooth that gives info about charge time/usage time etc. The Cellink battery option was important to me as it means it doesn't drain the car's OEM battery for parking mode. Fuse 125 is what I used to connect the Cellink battery to after I did plenty of research on the forums. It is a switchable fuse that people have been using on their F80/82 which means it is powered only when the ignition is on (and for a short time after the car turns off). You need to use an add-a-fuse which is included with the Cellink neo battery. *** I have switched the fuse to 145 to connect the Cellink battery now as this switchable fuse powers off immediately after the ignition is off, unlike fuse 125 that stays on for a few minutes!*** https://f80.bimmerpost.com/forums/sh....php?t=1568426 I ran the power cord on one side of the car, and the rear view coaxial cord on the other side. It is hard to stuff 2 wires in the same space in the headliner. I blu-tacked the cameras as a test first to make sure they were oriented correctly before committing with the double sided tape. That was an excellent idea as it turned out that in the middle of my rear view camera's lens was a line from the element of the rear window demister! The Cellink battery fits nicely in the boot under the liner next to the puncture repair kit. The Blackvue oem SD cards are expensive. I bought an endurance Samsung one for less than half the price and it works fine. Make sure it is endurance class 10 as I think these are designed for multiple writing and re-writing, and also have a larger temperature operating range. Overall a great product, albeit slightly expensive. Resolution is very clear. The wifi connection to download the videos to your phone is a good feature but you have to be in the car. The cloud feature although a great idea, doesn't work unless your car is close to a wireless router, or you have a wifi dongle sitting in your car with constant internet connection. Cheers, hope it is of use to some!  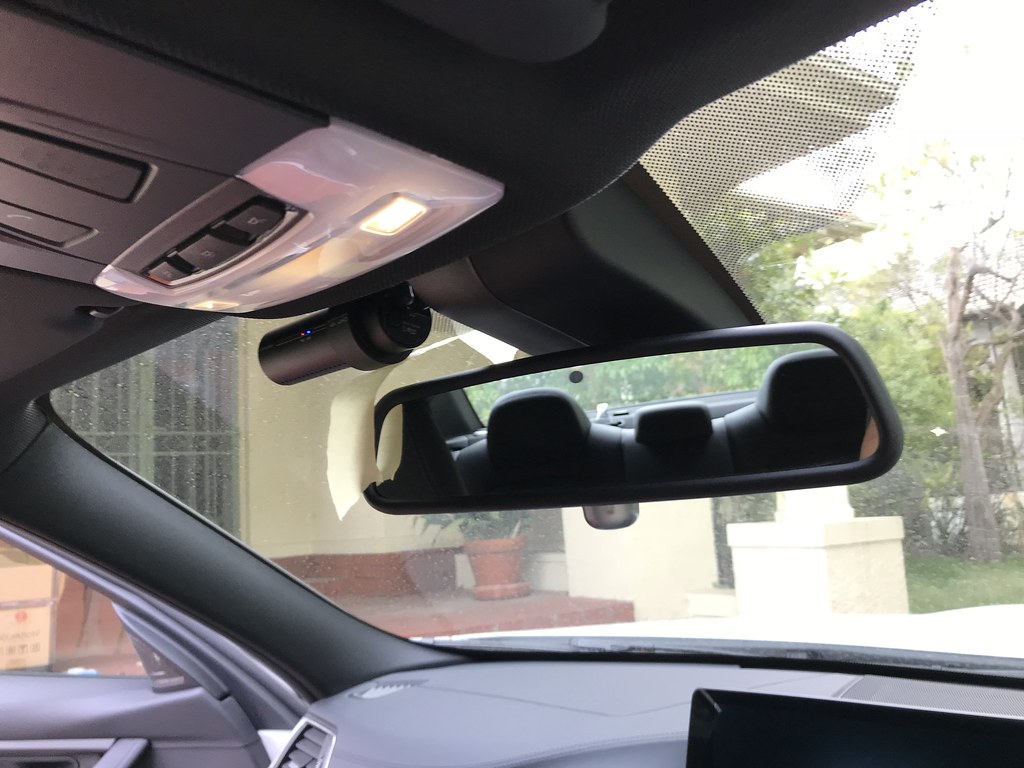 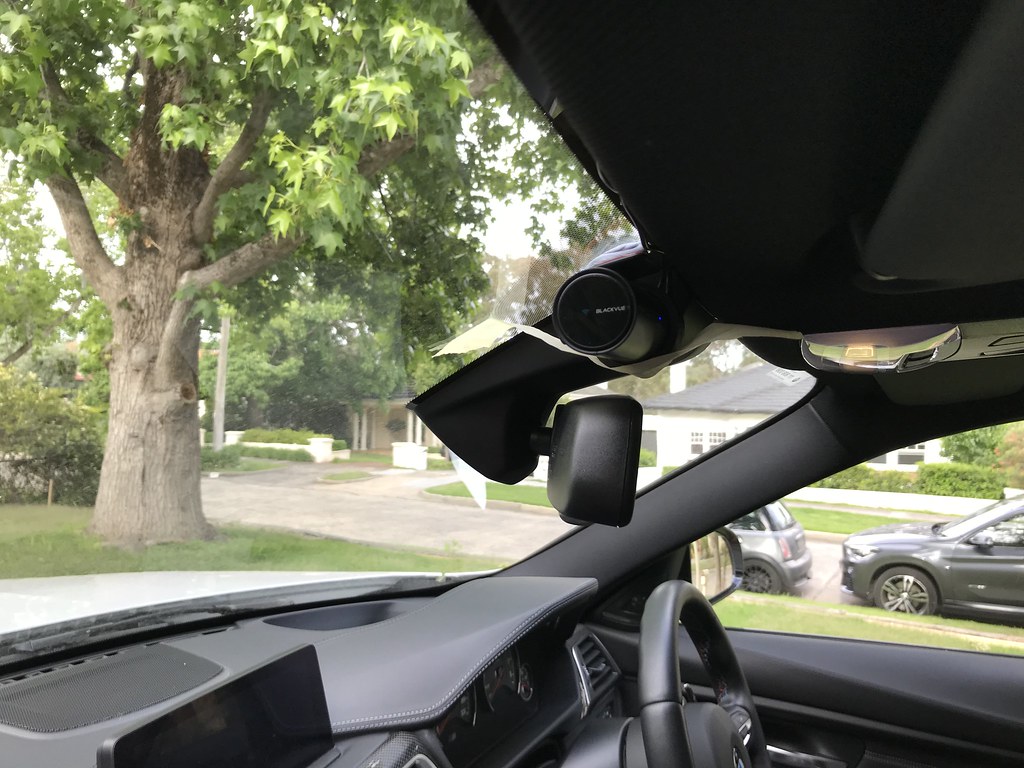 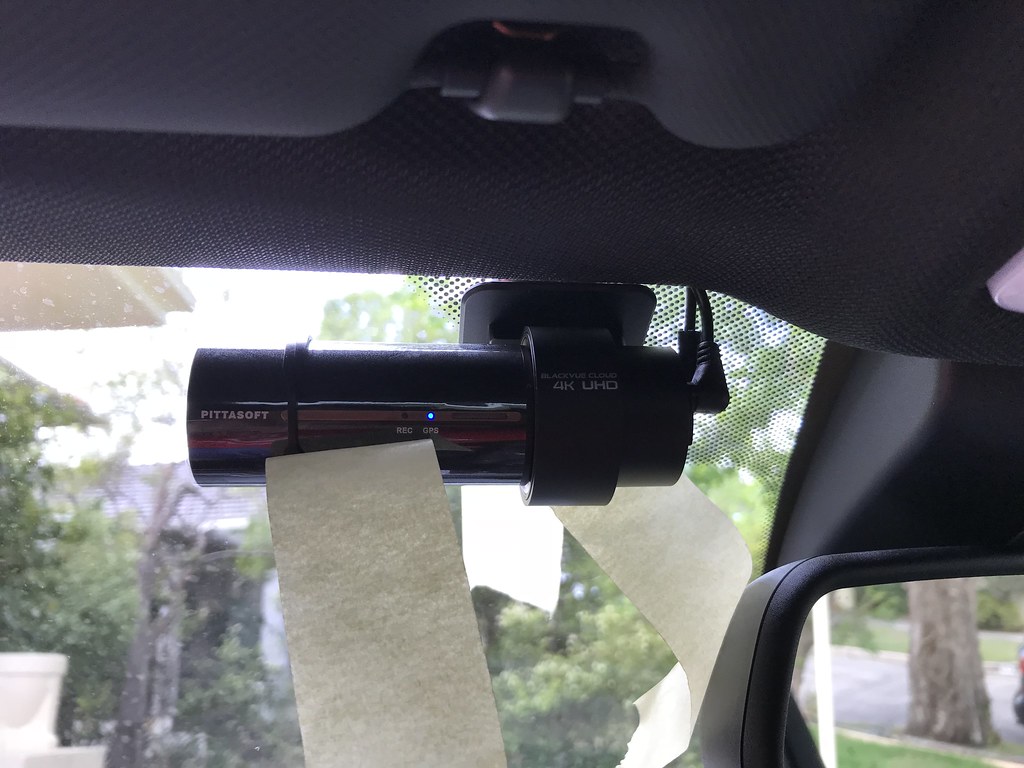 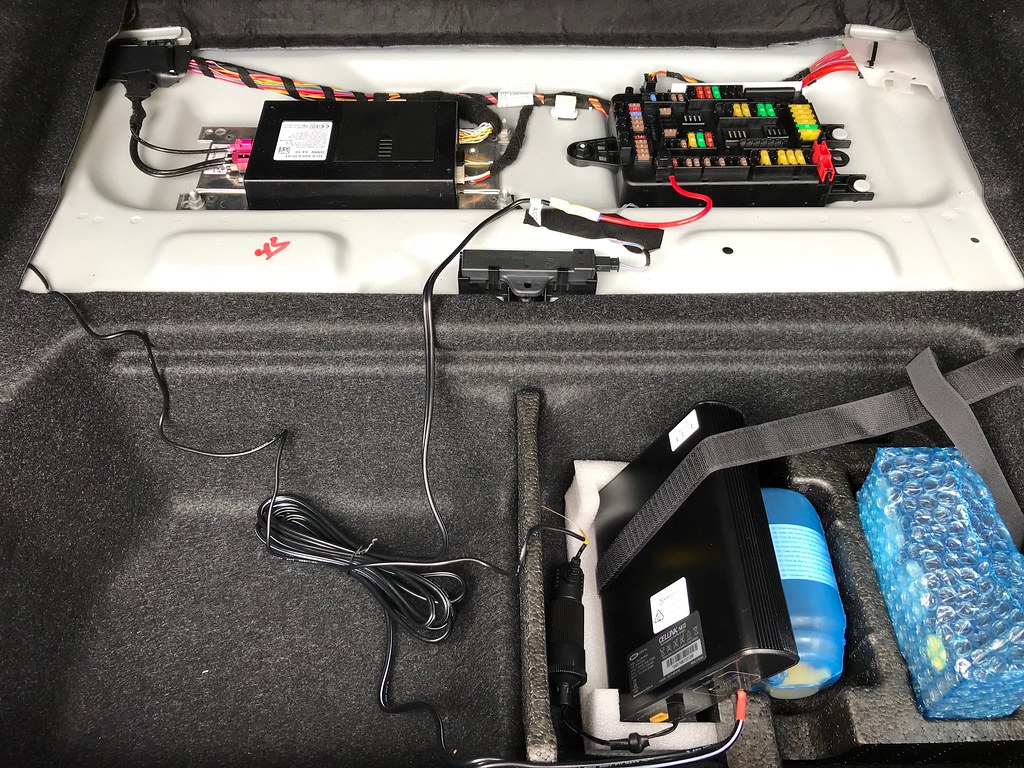 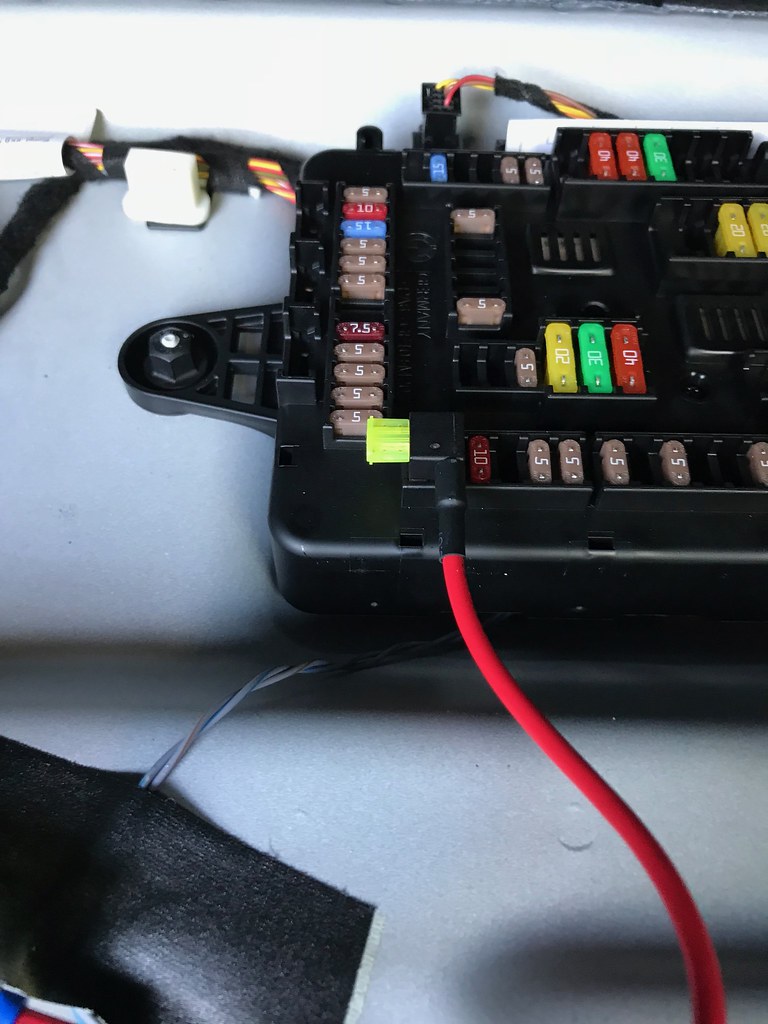 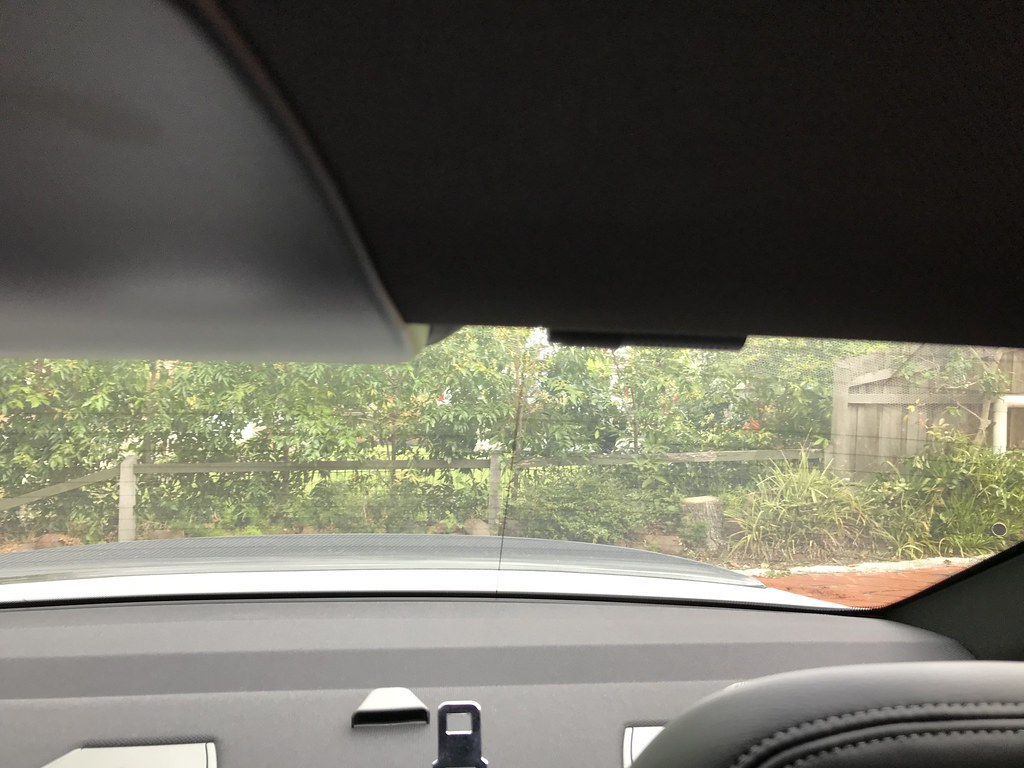 Last edited by im_dave; 12-30-2018 at 10:31 PM.. |
|
Appreciate
6
|
| 11-19-2018, 07:08 PM | #5 | |
|
First Lieutenant
59
Rep 398
Posts |
Quote:
|
|
|
Appreciate
0
|
| 11-19-2018, 10:07 PM | #6 | |
|
Enlisted Member
 6
Rep 34
Posts |
Quote:
|
|
|
Appreciate
0
|
| 11-22-2018, 02:18 AM | #7 |
|
First Lieutenant
59
Rep 398
Posts |
Here is some pictures of the wiring:
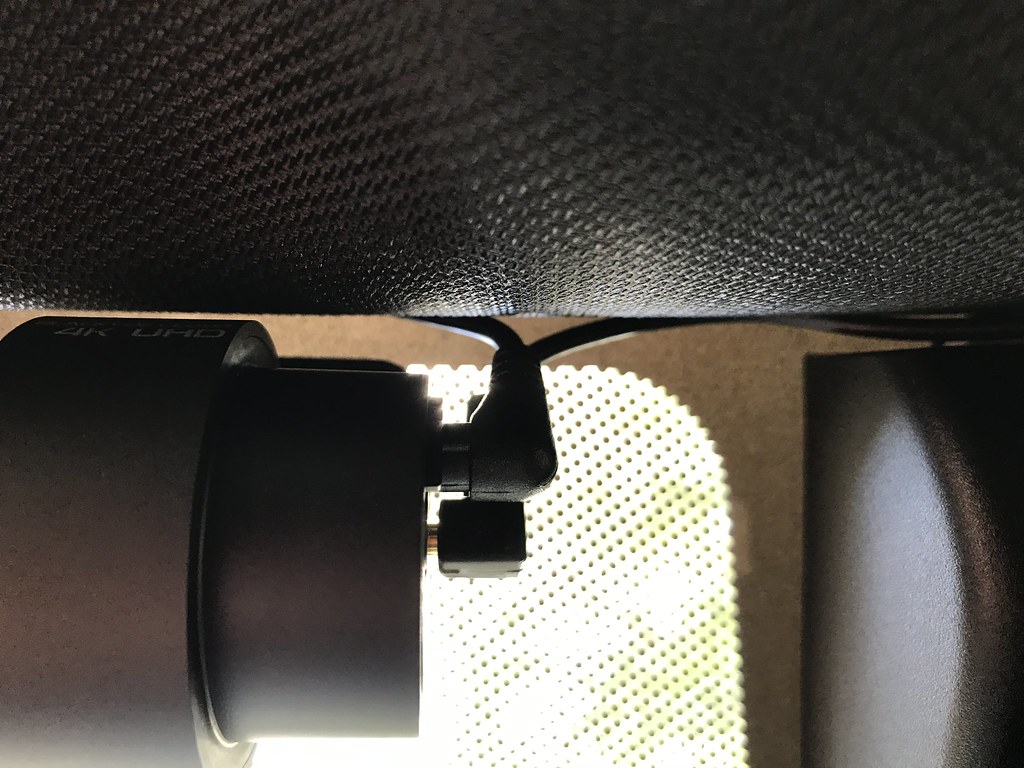 I mounted the dashcam just to the left side of the rear view mirror. I tried to mount it in the black dots on the edge of the windshield to hide it as much as possible. As you can see, one wire goes left (power) and one goes right (connection to rear view) 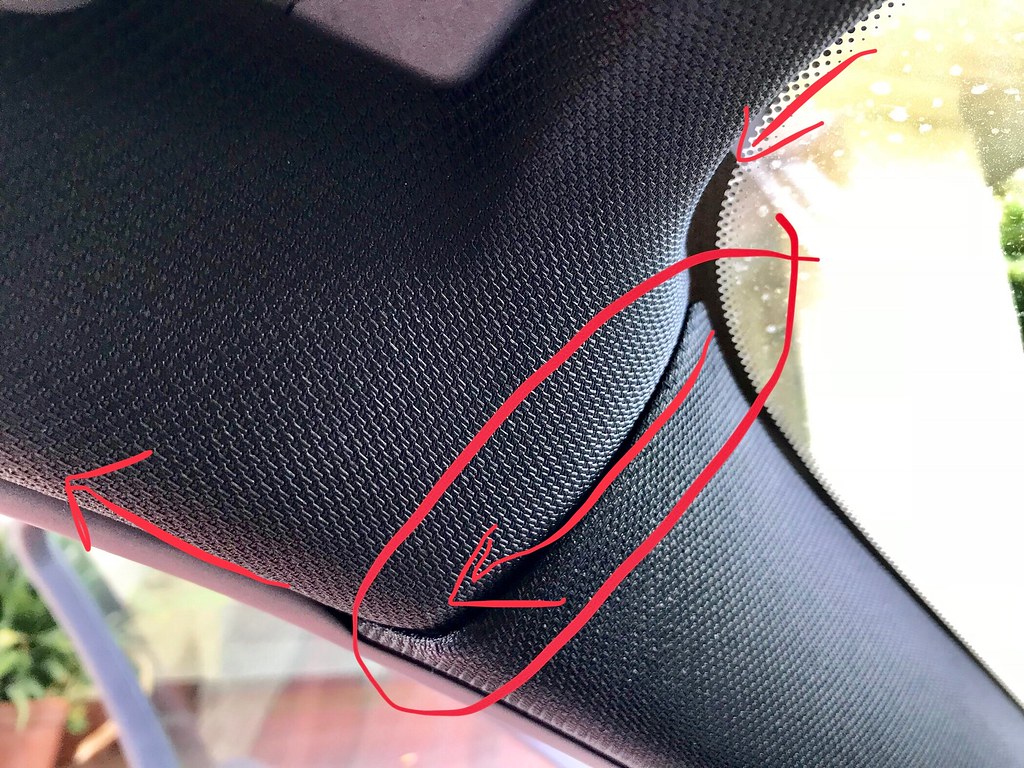 There is a space between the windshield and the headliner on the roof that you can tuck the wire into easily. When it comes to the corner in the A pillar you have to tuck it in the between the headliner seams - you can push the wire in to the space or use a trim removal tool to wedge it open to help. After that it tucks under the rubber weather strip which lifts up easily.  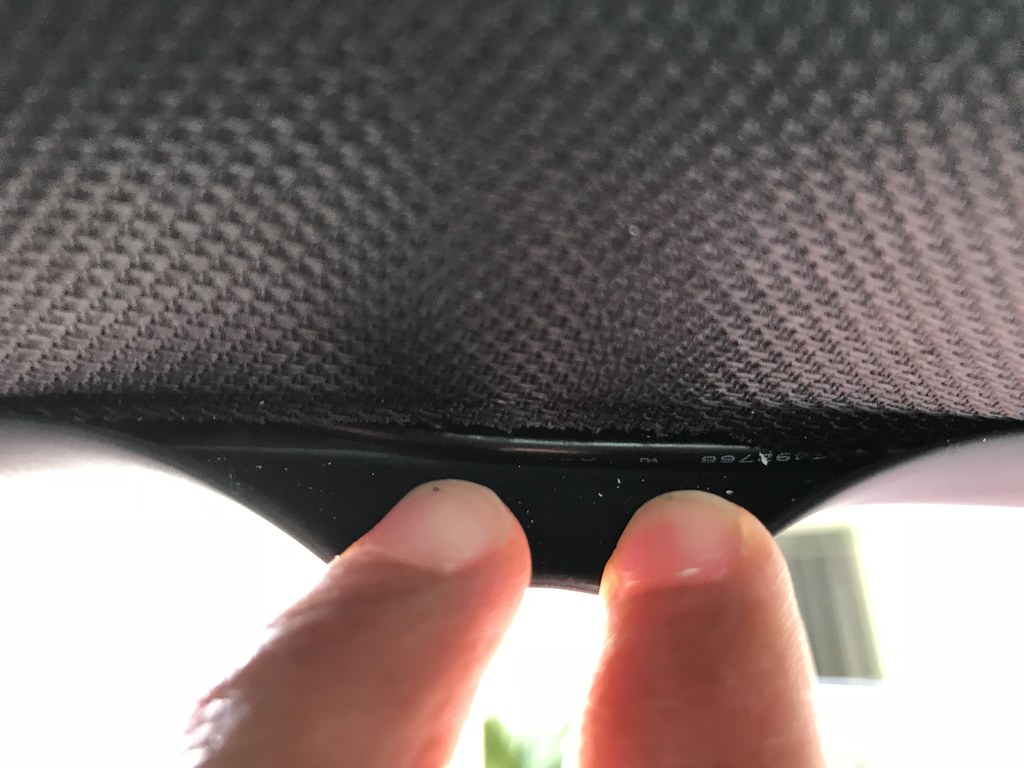 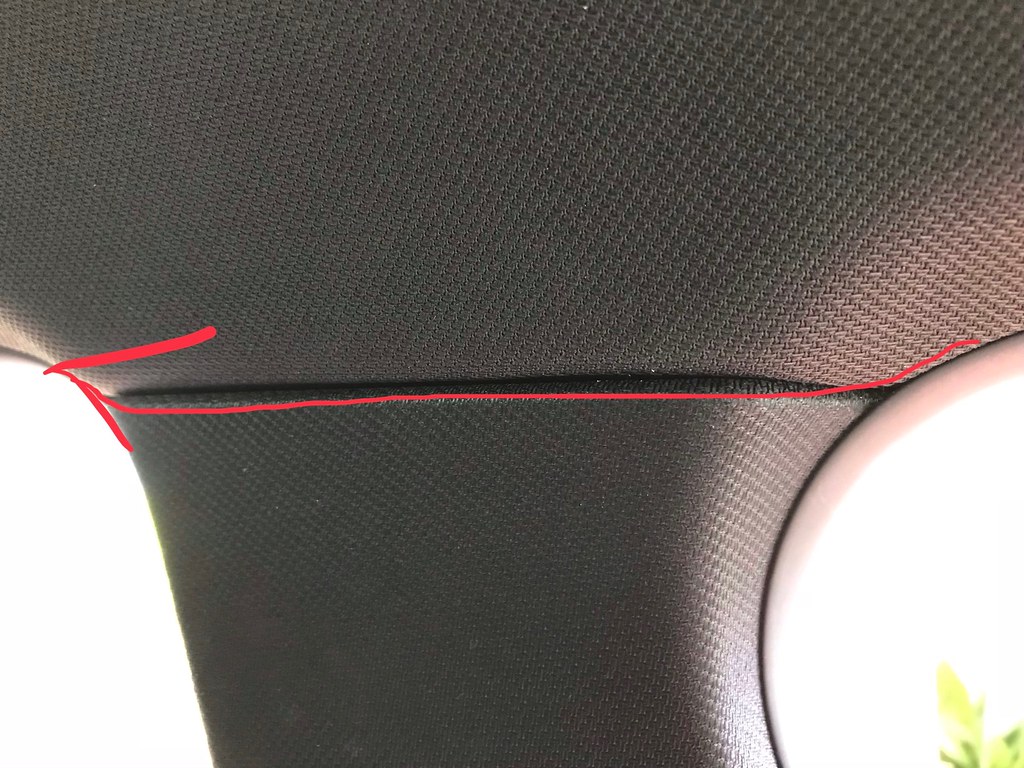 I found it difficult to squeeze 2 sets of wires between the trim between the front and rear doors in the B pillar, but 1 wire easily fits. Hence I routed one wire the other side. 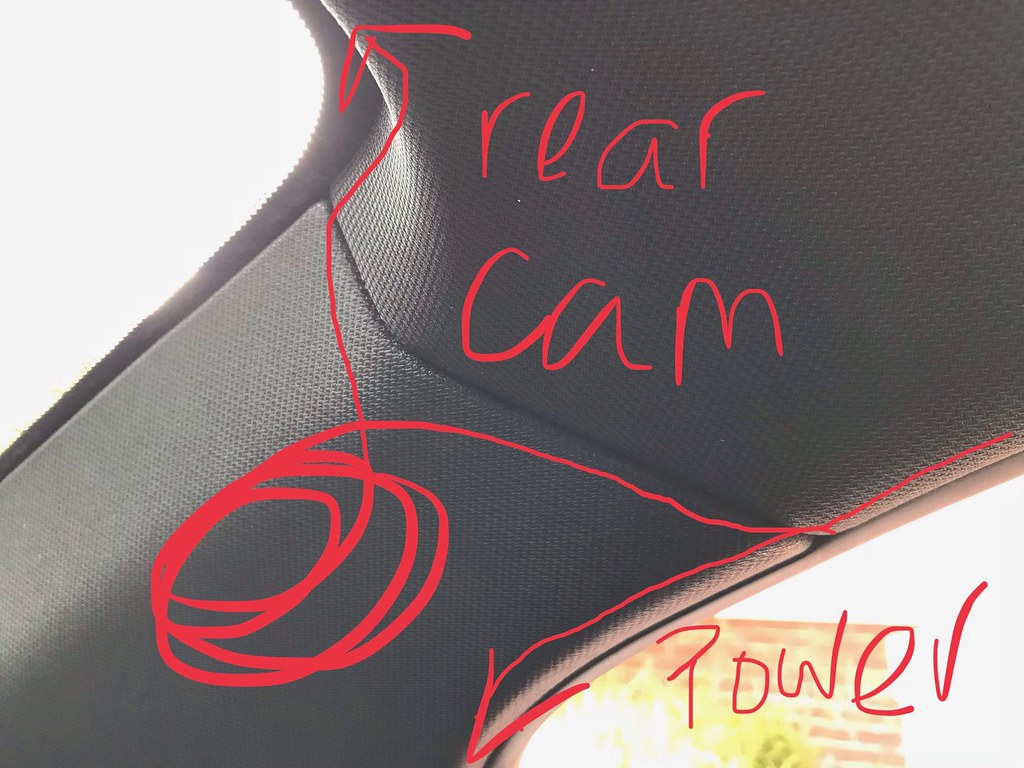 When you get to the rear of the car, you can route the wire either through the trim in the C pillar and up to the rear windshield (for the rear camera connection) or down the side of the seat to the boot/fuse area. 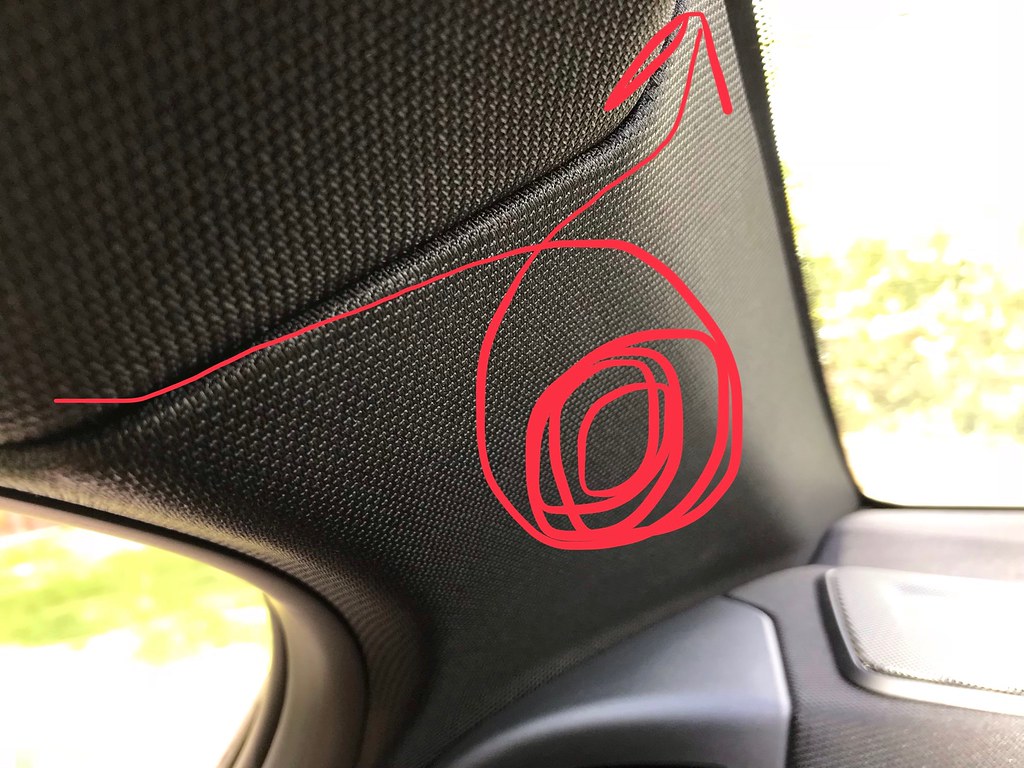 There is a lot of space to 'stuff' excess wire behind the C pillar trim adjacent to the rear window. This is where I placed excess wire for the rear camera connection. The excess wire for the power I just left in the boot. 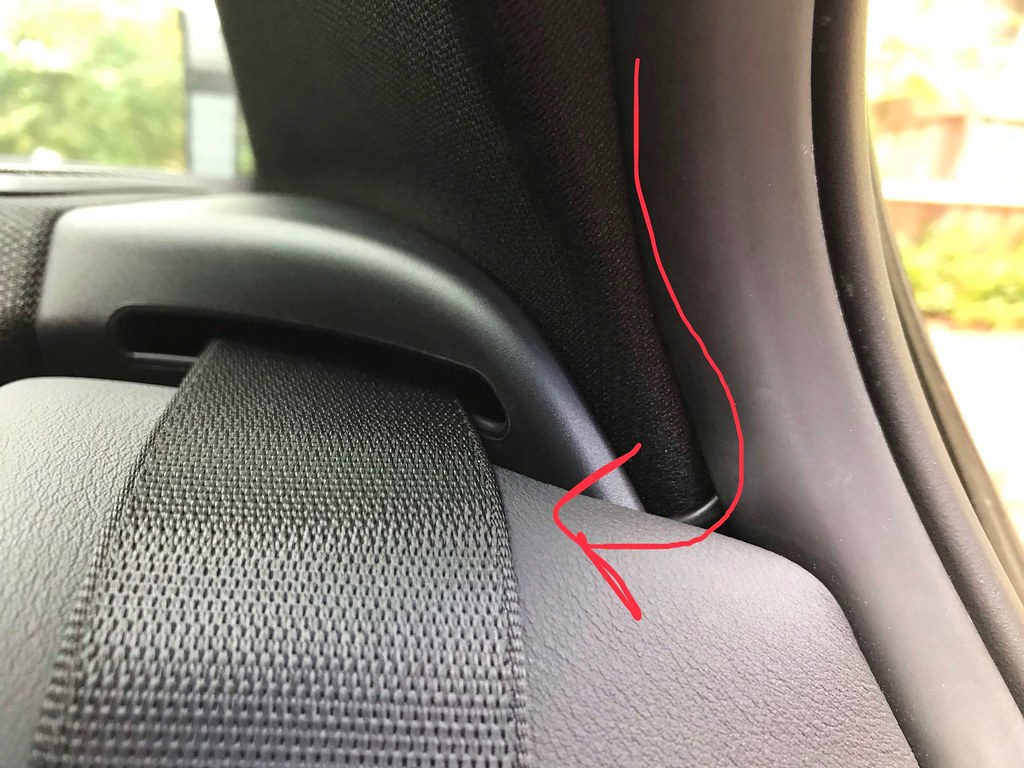 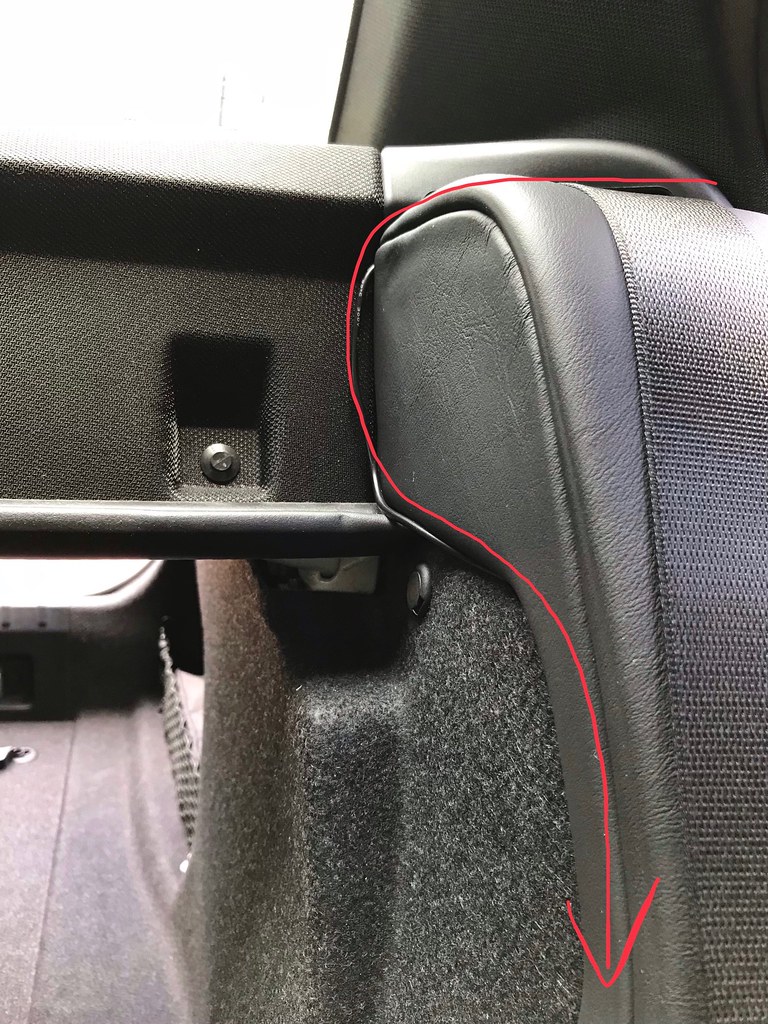 You have to put the rear seats down to route the power wire along the side of the trim. 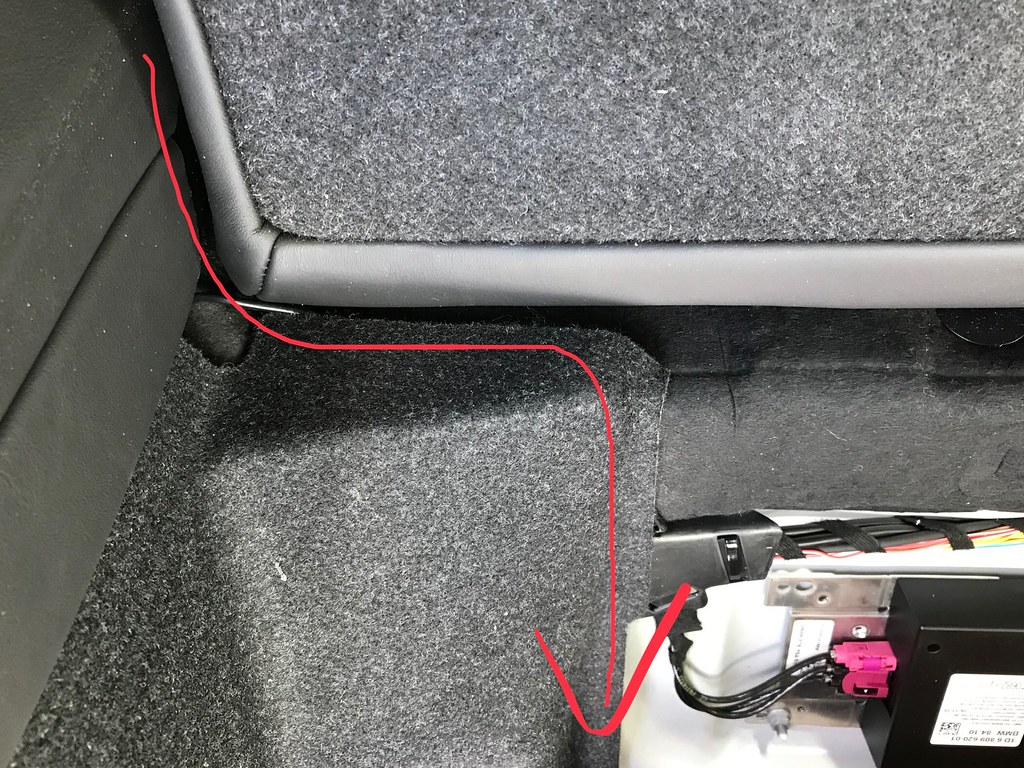 You can then continue the wire under the carpet trim of the boot to the fuse area. I routed the power wire on the left hand passenger side of the car and the rear camera connection on the right hand driver side of the car. Many people said they routed both wires on one side but I found it difficult to fit 2 wires between the trim pieces in the B pillar especially. Another trick I found is to un-tangle and straighten the wires before you start! Enjoy! |
|
Appreciate
4
|
| 11-22-2018, 04:45 PM | #8 |
|
Enlisted Member
6
Rep 34
Posts |
Cheers Dave! With the B and C Pillars, did you have to remove the trim? or did you just stuff the wires in?
Also you bought 2x Cellink Neo batteries? One for front and the other for rear? It looks like there is only 1 output per battery? Do they have a battery pack that powers two cams? |
|
Appreciate
0
|
| 11-22-2018, 06:18 PM | #9 | |
|
First Lieutenant
59
Rep 398
Posts |
Quote:
You only need one battery that powers the front. The cable that connects the front to the rear provides the power. The second set of cam/card/cellink battery in the pic was for my wife's car! |
|
|
Appreciate
0
|
| 11-22-2018, 08:24 PM | #10 | |
|
Enlisted Member
6
Rep 34
Posts |
Quote:
 I was thinking why you doubled up! I was thinking why you doubled up!  Hopefully I can score one with this black friday sale!! |
|
|
Appreciate
0
|
| 11-22-2018, 09:55 PM | #11 | ||
|
Captain
246
Rep 635
Posts
Drives: 2016 F80 & 2016 F15
Join Date: Oct 2015
Location: Seattle, WA
|
Quote:
|
||
|
Appreciate
0
|
| 12-30-2018, 10:33 PM | #12 |
|
First Lieutenant
59
Rep 398
Posts |
For those of you that are interested - another forum member has suggested to use Fuse 145, which switches off immediately after the ignition is off, hence there is no drain on the battery at all. Fuse 125 stays powered for 5-10 minutes after the ignition is off. I did not have any issues using Fuse 125, but to avoid any potential long term issues with the battery, Fuse 145 may be better suited.
 Fuse 145 being used. https://f80.bimmerpost.com/forums/sh....php?t=1568426 Cheers Dave |
|
Appreciate
0
|
| 03-12-2019, 03:32 AM | #14 | |
|
Private
 0
Rep 51
Posts |
Quote:
How is the view of the road at that top left corner ? Do you have an image or video? Cheers! |
|
|
Appreciate
0
|
| 03-16-2019, 06:01 AM | #16 | |
|
First Lieutenant
59
Rep 398
Posts |
Quote:
Here are some pics from the front and back - screen shots from the video recordings. The resolution of the video recording is better than these pics as these are screen shots. You can zoom up to the number plates without any issue on the video recording. Cheers |
|
|
Appreciate
1
domino_z1232.00 |
| 03-28-2019, 01:10 AM | #19 | |
|
Captain

97
Rep 812
Posts
Drives: E91 335i, B5 RS4, F31 330i
Join Date: Jun 2014
Location: Sydney, Australia
|
Quote:
The Blackvue does look good, do you have a Youtube video or can you email me one to look at? Is it good for drive day videos? Also what does the rear camera look like? thanks |
|
|
Appreciate
0
|
| 03-28-2019, 04:19 AM | #20 | ||
|
First Lieutenant
59
Rep 398
Posts |
Quote:
|
||
|
Appreciate
0
|
| 05-17-2019, 07:48 PM | #22 |
|
Private First Class
 41
Rep 144
Posts |
Hi Dave,
Out of curiosity does it default to parking mode if still working off battery? So you run it on parking mode settings? Doing this in next week or 2.... (your write up is awesome) D |
|
Appreciate
0
|
Post Reply |
| Bookmarks |
|
|


