| 01-12-2018, 03:09 PM | #26 | |||
|
Major
 603
Rep 1,038
Posts |
Quote:
Quote:
Quote:
|
|||
|
Appreciate
1
again6134.00 |
| 01-12-2018, 03:36 PM | #27 | |||
|
Captain
 
554
Rep 908
Posts |
Quote:
__________________
|
|||
|
Appreciate
0
|
| 01-12-2018, 04:21 PM | #28 | |
|
Lieutenant Colonel
 2228
Rep 1,897
Posts |
Quote:
|
|
|
Appreciate
0
|
| 01-14-2018, 03:46 PM | #29 |
|
Private First Class

21
Rep 91
Posts |
I bought a CS front lip from RW carbon. They said the lip has been modified to be installed without needing any support brackets or removing the bumper. But looking at RW's lip and the OEM CS front lip, they look the exact same. Even have the mounting holes for where the support brackets would be installed.
Am I still okay installing it without the brackets or should I return it back to RW Carbon? Just worried that the lip would get ripped off at high speeds since it won't have the support brackets. |
|
Appreciate
0
|
| 01-14-2018, 08:39 PM | #33 | |
|
Captain
602
Rep 871
Posts |
Quote:
|
|
|
Appreciate
0
|
| 01-14-2018, 08:43 PM | #34 | ||
|
Private First Class
21
Rep 91
Posts |
Quote:
|
||
|
Appreciate
0
|
| 01-14-2018, 10:11 PM | #35 | |
|
Major
899
Rep 1,009
Posts |
Quote:
  |
|
|
Appreciate
5
|
| 01-15-2018, 03:59 AM | #37 | ||
|
Second Lieutenant

125
Rep 244
Posts |
Quote:
|
||
|
Appreciate
0
|
| 01-15-2018, 08:12 AM | #38 |
|
Major
899
Rep 1,009
Posts |
Finish and fitment is good however it's about 1/4" short of the wheel well arches on both sides. I haven't seen any close ups of the the real one so it's difficult to compare fitment. I could have adjusted the whole lip towards the rear of the car to minimize the gap however it would make the front look weird. This was the best compromise on the placement in my opinion. Front and sides are flush with the bumper. Install took me 5 hours however I worked extremely slow (in part due to the cold garage). It took me an hour playing around with fitment/placement. I also took an hour scrounging for parts and making the brackets.
The lip has a female thread already pre-installed for the center mount. I luckily had a bolt with the matching thread. For the center bracket, I found an L-bracket that worked (might require some bending). I screwed it into the front bumper dead center and added a plastic spacer. For the two side brackets I used a piece of 1/2" wide x 1/8" thick aluminum that I bent into shape then added the necessary holes. Overall, nothing needed to be cut or trimmed. You just start by removing the covers on the bottom side of the front bumper corners. It's held in place by 7 screws on each side. After installing the lip, only the two corner holes on the lip will align to the factory screw holes. The rest of the holes I used self tapping screws. In total about 20 screws holds it in place so I don't think it's going anywhere. It was freezing in my garage so VBH tape was useless so I opted not to use it. Once the lip is screwed into place, just reinstall the bottom side covers. In some areas you need to press it against the lip and secure the factory screws back in place and everything should fit fine. I'm glad I didn't have to remove the bumper for this install. First off, I wouldn't have known where to begin removing it and it would have taken much longer. The only benefit of removing the bumpers appears to be installing the brackets. The RW version of this lip doesn't include any hardware so that point was moot after I was able to make the custom ones. Enjoy the pics! It's freezing outside (12F) so these will have to do.       |
|
Appreciate
1
MPoweRo428.00 |
| 01-15-2018, 08:20 AM | #39 |
|
Lieutenant Colonel
2228
Rep 1,897
Posts |
It would nice to know/see if the lip is designed to be ~1/4" short of the wheel well arches on both sides. In my opinion, I wouldn't characterize that as good fitment. I would not be happy with that fitment at any price point much less $2,000. It also doesn't appear to be flush with the bumper in the areas closest to the wheel well arches. I'm not at all trying to come for your installation skillset but it just doesn't look good for what's supposed to be an OEM part on what is essentially the same car from a chassis/shell perspective.
|
|
Appreciate
0
|
| 01-15-2018, 12:12 PM | #41 | ||
|
Second Lieutenant
125
Rep 244
Posts |
Quote:
Quote:
|
||
|
Appreciate
0
|
| 01-15-2018, 01:27 PM | #42 |
|
Private First Class
21
Rep 91
Posts |
If you look up pictures of the M3 CS lip, even the OEM one has a slight gap where the lip meets the wheel well. So if the fitment on the Rw one is good besides that slight gap, Id be fine with it.
|
|
Appreciate
0
|
| 01-15-2018, 01:55 PM | #43 | |
|
Captain
554
Rep 908
Posts |
Quote:
__________________
|
|
|
Appreciate
0
|
| 01-15-2018, 03:32 PM | #44 |
|
Major
899
Rep 1,009
Posts |
In looking at pics of the real CS M3, I noticed there's the same gap near the wheel arches. I think it makes sense from a design standpoint. If your wheel is full lock for a U-turn for example, you wouldn't want the tire to snag the corner of your lip and possibly rip it off. It would look better flush but that's probably a good compromise.
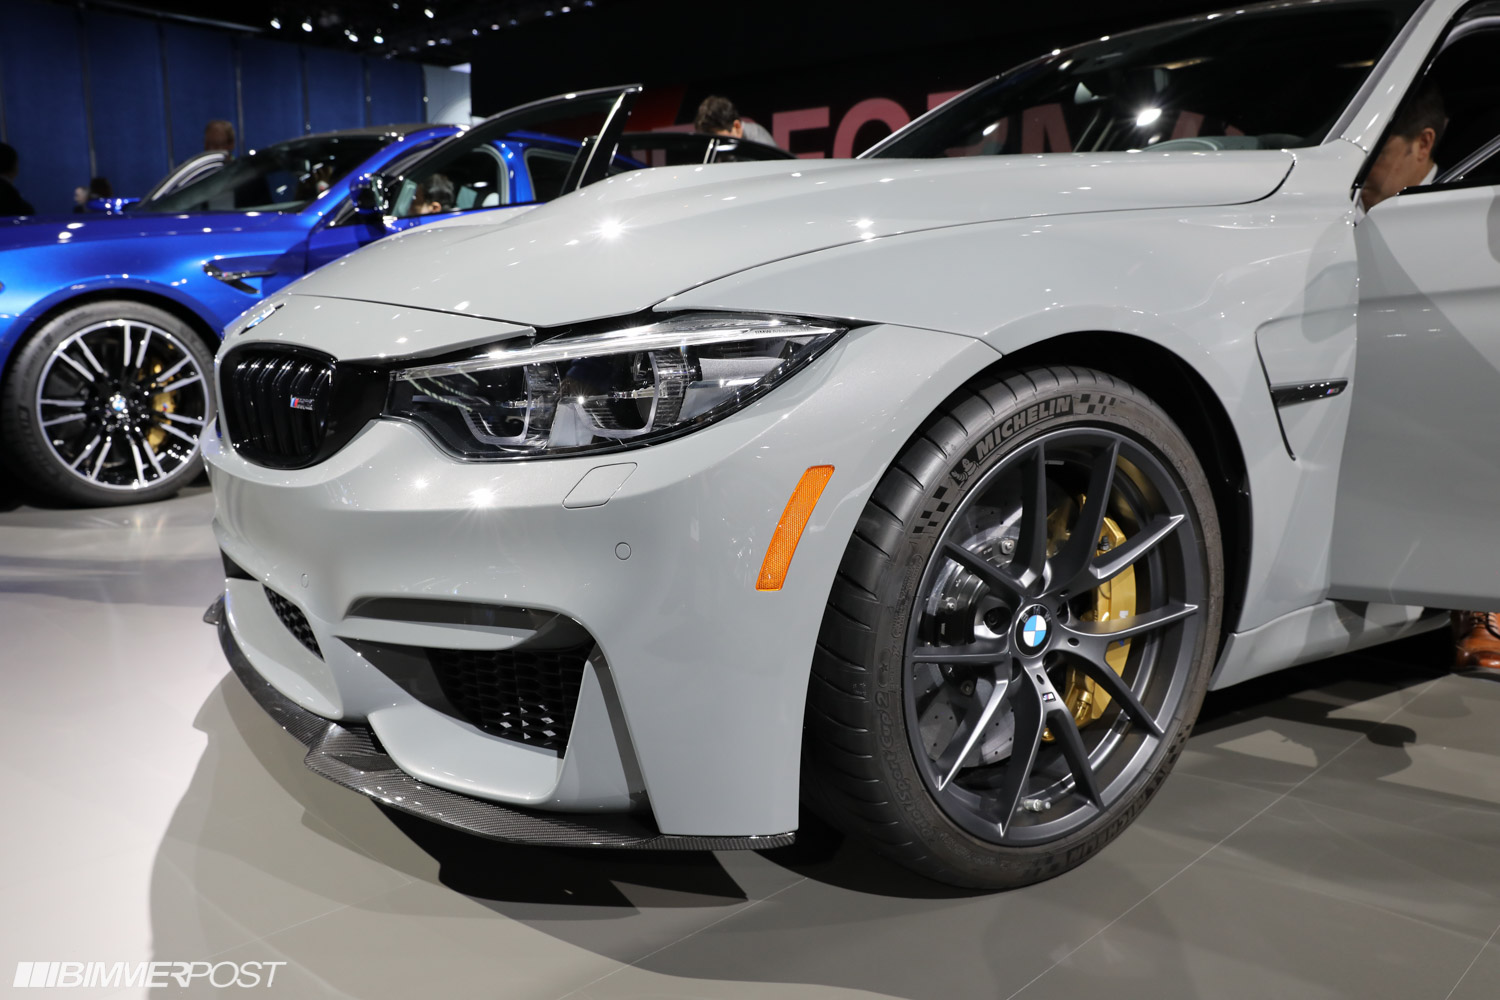 Regarding the custom bracket, I think it's added security but doesn't ensure the same level of support as the OEM bracket. I think if you're concerned at all, just add some 3M VHB tape with the install. If the unfortunate happens with road debris I rather have the lip come off rather than taking the whole front bumper with it. I braved the coldness and took a few more outdoor pics. One thing I noticed about the real CS pictured above, their lip is slightly tucked right in the middle below the air dam. About 1/8" or so. My install I opted to make it as flush as possible so it's a smoother transition from the angled center portion of the lip to the lower bumper.    |
|
Appreciate
0
|
Post Reply |
| Bookmarks |
|
|


 love it, just can't swallow the price.


