

| 04-21-2016, 03:27 PM | #1 |

75
Rep 885
Posts |
Vivid Racing Presents: WP Pro Brake Education Series Since 1981, WP Pro has been enthusing the racing circuits of the world by supplying them with technologically leading braking systems, built to outlast and outperform the leading players in the market. They aim to continue this prestigious heritage by focusing on quality and innovation. Caliper Assembly Production of the Calipers consists of two main processes. The first is the production of the Caliper body, or the skeleton, and the second is the fabrication of the pistons. The flowchart below outlines the production process of the Calipers. Step 1: Cold Forging When the raw material is received from the mill, WP Pro forges it into the basic outline of the high performance calipers being used today. Figure 1 below illustrates what the cores of the calipers look like after it has passed through the forging facility. We cold forge 6061 Aluminum Alloy under a minimum weight of 5,000 tons to ensure. Step 2: CNC Machining of the Core After forging is complete, the CNC process of the Caliper begins. The cores are machined to very strict tolerances defined by our in-house engineers during the design stage of the braking system. In this step, the outer dimensions of the core as well as the mounting holes and core surfaces are machined on both the outer shell and inner shell. Figure 2 below shows the caliper cores after this stage of the process. Step 3: CNC Machining – Piston and Fluid Channels Once the cores have been machined, the pistons bores and internal fluid channels are machined out. These aspects of the braking caliper are critical to the performance of the calipers and are carefully designed and cut to allow for laminar flow of the fluid. This in turn allows for predictable and dependable breaking performance throughout the lifetime of the calipers. Figure 3 below illustrates the end result of this step of the process. Notice how painstakingly machining out the bores and channels reveals clean lines and accurate dimensions. Step 4: Painting and Finishing After the final machining of the piston holes and the fluid channels, the pistons are then passed through the painting station where we apply our signature WP Pro colours to the calipers. The colours range from a vibrant, classic WP Red to a wild and wonderful WP Hyper Banana yellow. Step 5: Piston Assembly In parallel to the production of the calipers, the pistons are produced using either titanium alloy for racing systems or stainless steel for high performance systems. The titanium alloy pistons will have vents machined into them to allow for efficient heat loss while racing. The stainless steel pistons will have dust boots to allow for unbeatable durability in a multitude of environments. Once produced, the pistons are carefully assembled into the caliper cores prior to the full assembly of the caliper. Step 6: Final Assembly With the pistons assembled and the calipers painted, the final step is to carefully put all the pieces together to form the caliper of choice. Below is an example of a finished EX-6 Series brake caliper with vented titanium alloy pistons and finished in WP Pro Black Caliper at that spec weighs around 2.4kg, with rigidity on par with forged monobloc but much better torsional rating thanks to the 2pcs construction, WP Pro are also working on updated version of it which they are slowly rolling out, that uses same pads etc, but 200 grams lighter. For rotors, again, WP Pro cast their own, They use their own formula that's different from others, the biggest benefit on that is better transfer of pad material, 90% of brake friction is by transferring brake pad material onto the disc and the actual brake pad compound, ours allow more even transfer, not to mention they are directional, that means left and right are different. Step 1: Casting of the Rotors For rotors, we start off by casting our own formula developed to enhance the brake performance by transferring more of the brake pad material. About ninety percent of brake friction is developed by transferring brake pad material onto the disc. Our engineers have developed a formula that allows for an even greater transfer rate to improve braking performance. Step 2: Machining – First Pass Once the rotor has been cast, it passes through the first stage of machining. During this stage the overall dimensions of the rotors are machined out to match the specific brake system being used. Below is a picture of the rotor after this machining process Step 3: Machining – Second Pass The second pass of machining brings in the detailed dimensions of the rotor. Here the mounts, slots, vents and directional arrows are machined into the rotor. Below is an illustration of the rotor once it has passed through the Second Pass of the machining process. At this stage, almost 10kg of steel has been shaved off from the original cast rotor. Step 4: Finishing During the finishing stage of the rotor, the surface is polished and the rotor is customized for the purpose at hand. The picture below shows the end result of this stage with a “Saw-Blade” rotor. This rotor is mostly used in light-weight and high efficiency applications. Other options for rotors are standard circular and slotted, or standard circular and cross drilled. Step 5: Assembly of the Rotors In this step, we assemble the fully machined Rotor Hats to the finished rotors. Our rotor hats are produced by forging stainless steel and CNC-machining it down to the desired dimensional tolerances The finished product is a finely assembled rotor and rotor hat as displayed in the figure below. Step 6: Balancing In this final step of the Rotor Assembly, the entire assembly is tested and balanced at a rotational speed equivalent to 320km/hr (200mph). Brake Pad Technology: WP Pro maximize contact area with our pads. You can have a giant looking caliper but with tiny pads, where WP Pro want to maximize contact area, minimize weight. Final Testing Prior to dispatching, every single one of our brake kits are subjected to a rigorous test using real brake fluid to ensure full compliance with our demanding specifications for high performance. You can rest assured that our kits not only look beautiful but perform even better than they look. |
| 04-21-2016, 04:05 PM | #2 |
|
Captain

378
Rep 850
Posts |
Cool intro.
Show me the race teams who run this kit.
__________________
Current
15 911 Turbo S Past 03 MB E55 AMG, 16 Grigio Medio F80 M3, 11 E92 M3, 13 BRZ, 06 Evo IX, 05 350Z |
|
Appreciate
0
|
| 04-21-2016, 05:17 PM | #3 | |
|
75
Rep 885
Posts |
Quote:
Below are photos from the 4 pistons calipers WP PRO built for race teams in WTCC, they were used amongst Chevy Cruze and Ford Focus, THANKS TO SAM from WP PRO. He has to dig deeper and find their their team names and more photos, some of them switch over seasons.    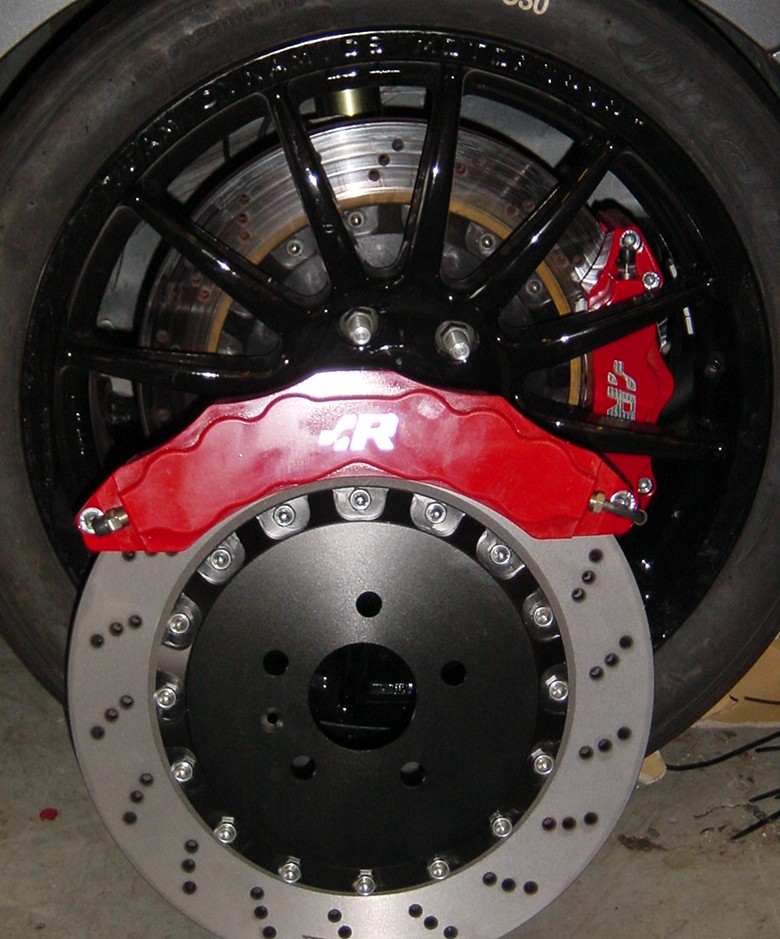 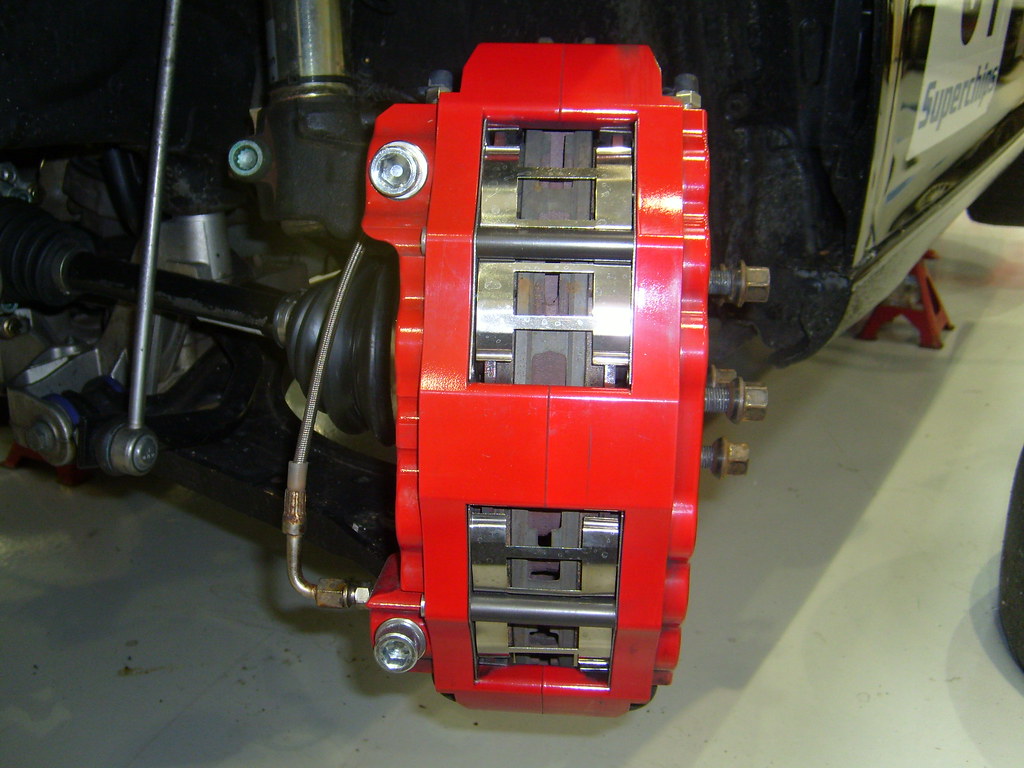 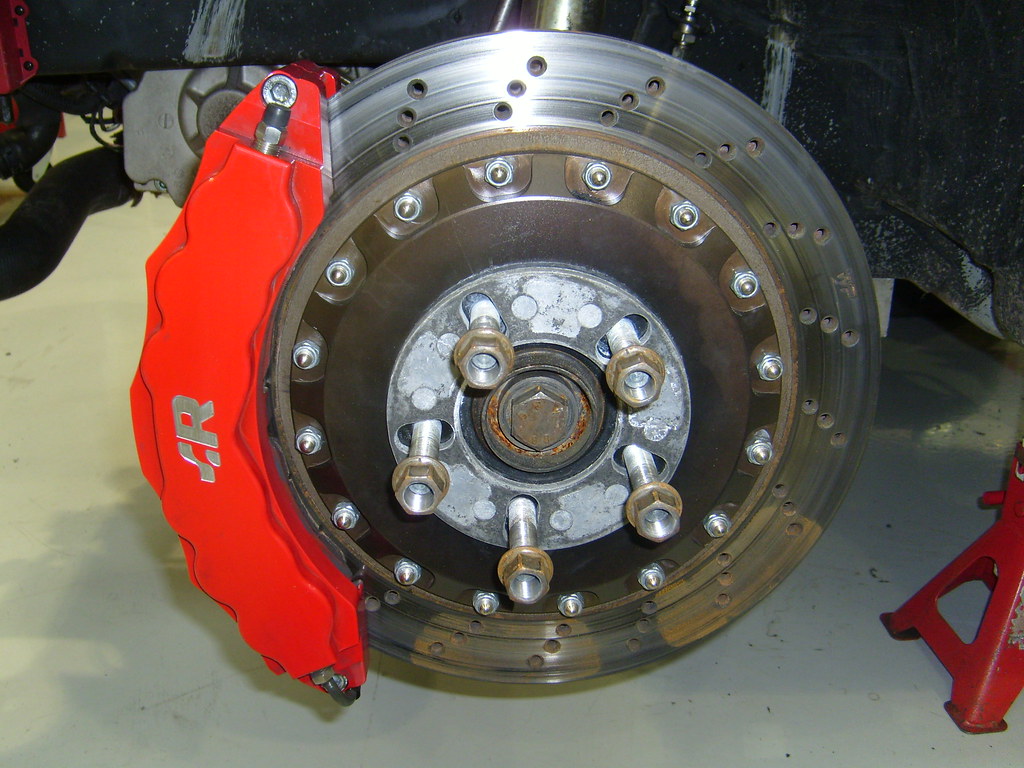 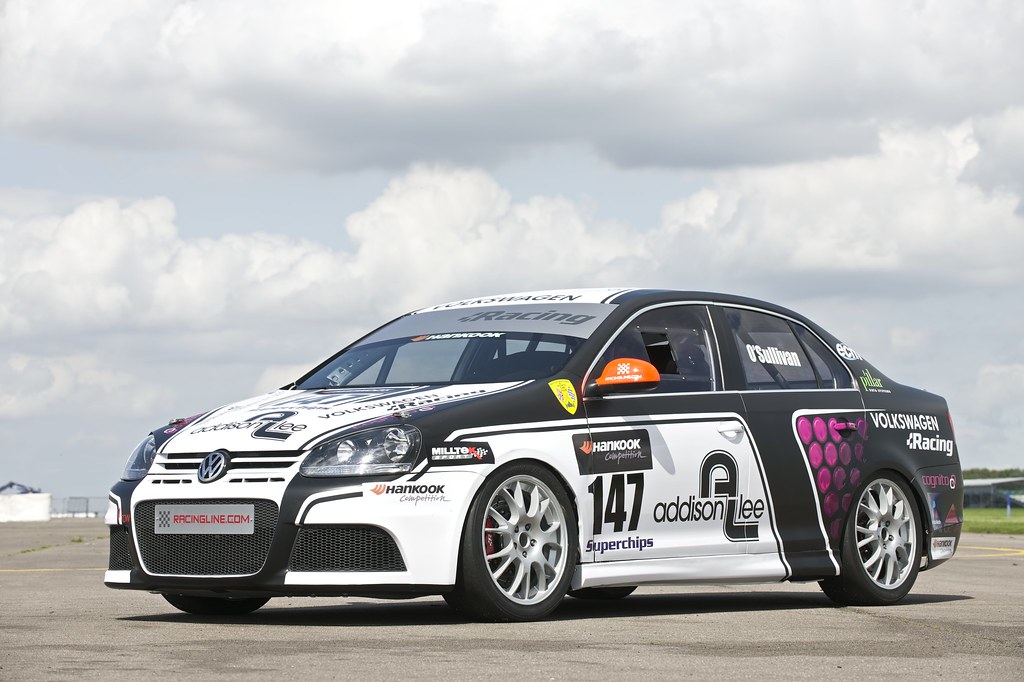 We really think the 380mm CCM set up is best for F8x You can see the weight saving on the system 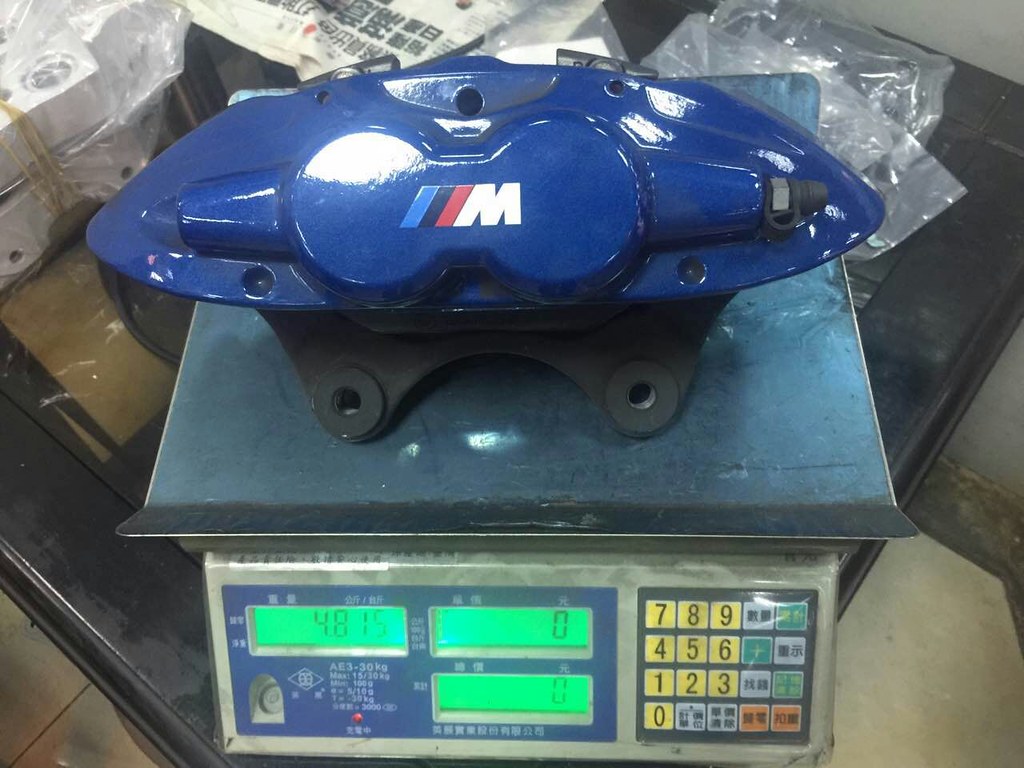 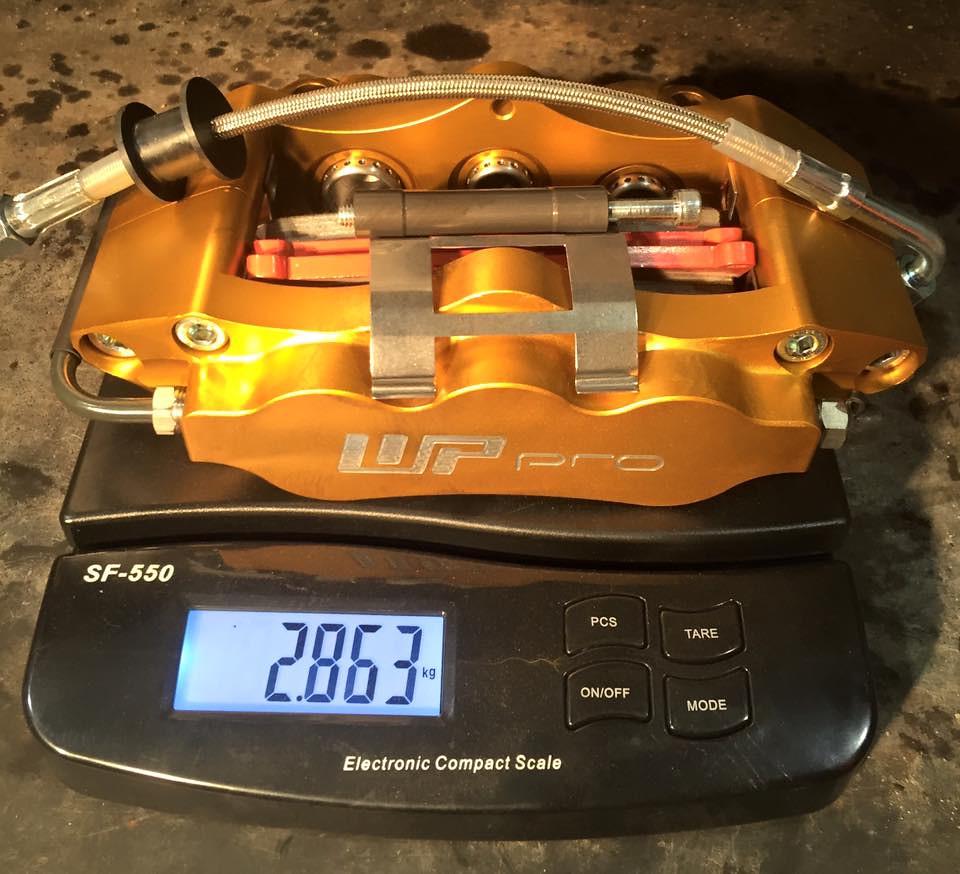 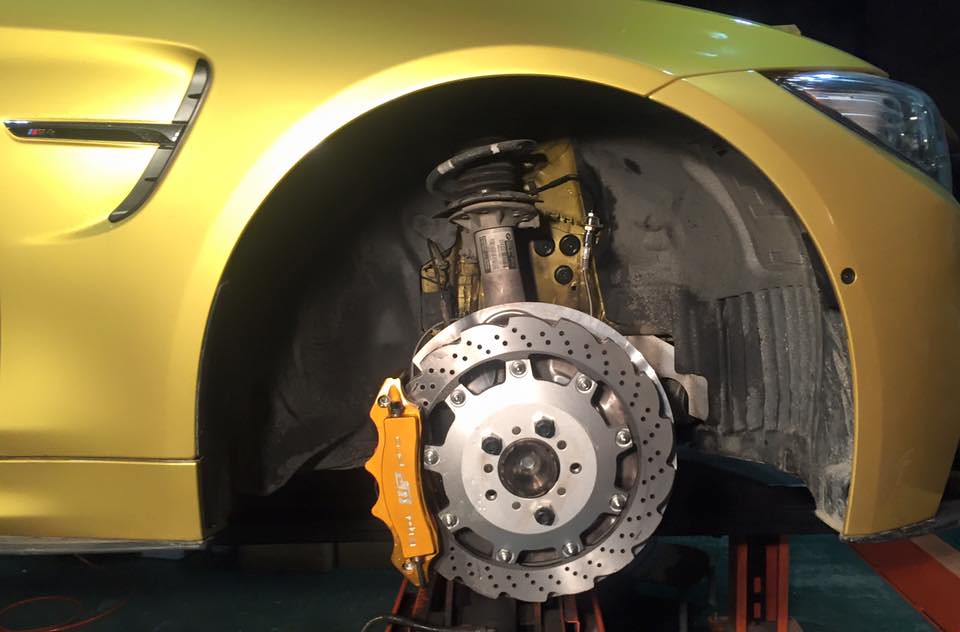 |
|
|
Appreciate
1
|
| 04-22-2016, 09:30 AM | #5 |
|
Second Lieutenant
91
Rep 299
Posts
Drives: m3 2015
Join Date: Mar 2015
Location: atlanta
|
WOW see the dollar signs all over that, but they do look good.
|
|
Appreciate
0
|
| 04-22-2016, 06:25 PM | #6 | |
|
75
Rep 885
Posts |
Quote:
|
|
|
Appreciate
0
|
| 04-23-2016, 11:21 AM | #7 | ||
|
Lieutenant
160
Rep 466
Posts |
Quote:
|
||
|
Appreciate
0
|
Post Reply |
| Bookmarks |
|
|


