I noticed that my brand new M3 makes quite bit of noise inside the car.

Coming from e92 335is, this was quite unexpected as my previous car was very quiet inside.
Tools Needed
1mm Felt Tape
Gummi Pflege
Scissors
1 - Rear Audio Speaker Area
There was pretty bad plastic rattle noise coming from rear area.
After taking a look at the area, I noticed there are these plastic covers (total of 3 in M3) behind the rear seat where rear speakers are located.
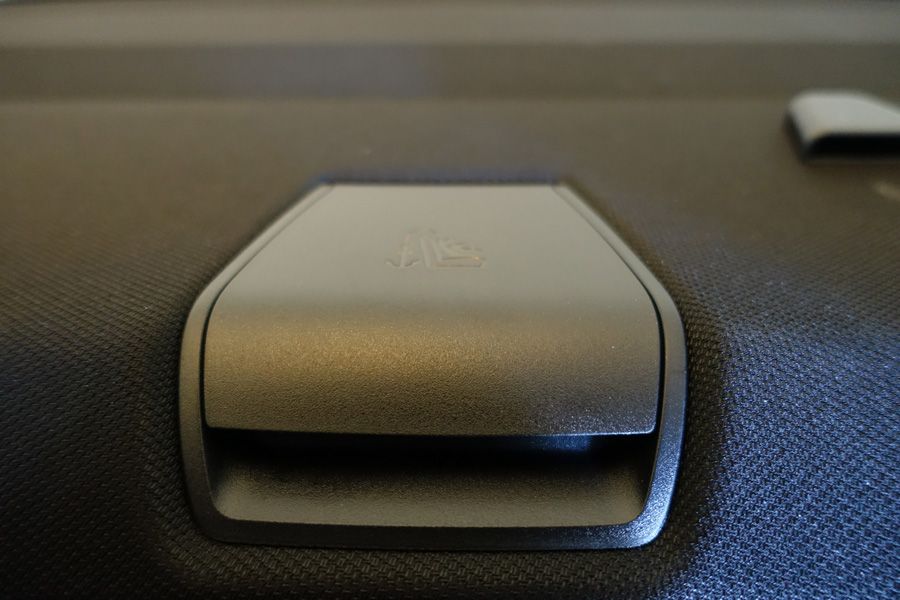
Just tap the surrounding area with your finger while these covers are in closed position.
If you do hear some plastic rattle noise, then this simple fix will resolve your issue.
Just apply 1mm felt tape under the cover so that the plastic cover and bottom piece do not come in contact directly. Do the same thing to other two covers.
 2 - Front A/C Trim
Roman@ESS
2 - Front A/C Trim
Roman@ESS posted great tips on how to fix some noises coming from front A/C area.
I followed his tips and added some twists to fix noise from AC trim.
1. Pull out A/C CF trim
This piece comes out easily without using any pry bar.
Just follow first 25 seconds from this video to take out the trim.
Make sure your car is off before pulling this out as you have to disconnect 2 connectors.
2. Pull out AC vent from CF trim
This piece is actually quite hard to take out.
Contact points that are holding AC vent is somewhat fragile and can break if you apply too much force.
If you are not confident in your skill, you can skip this and go to step 4.
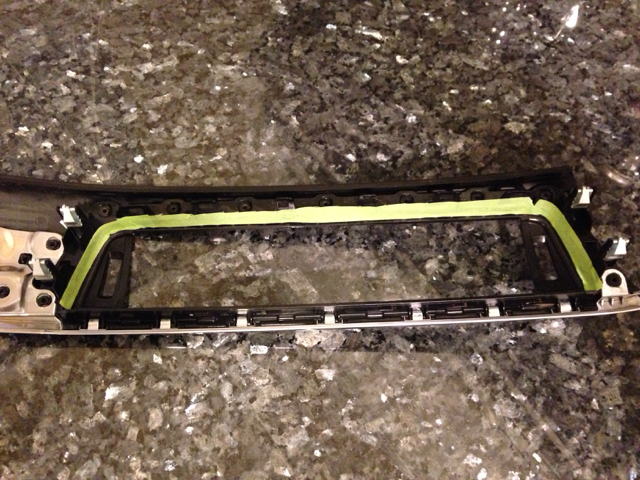
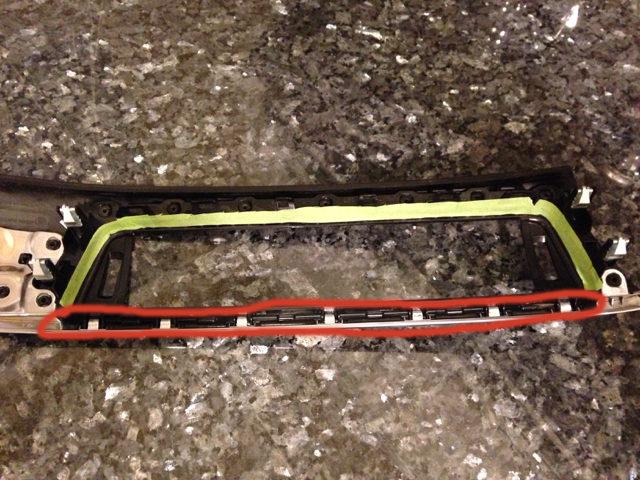
3. Apply felt tape around AC vent area
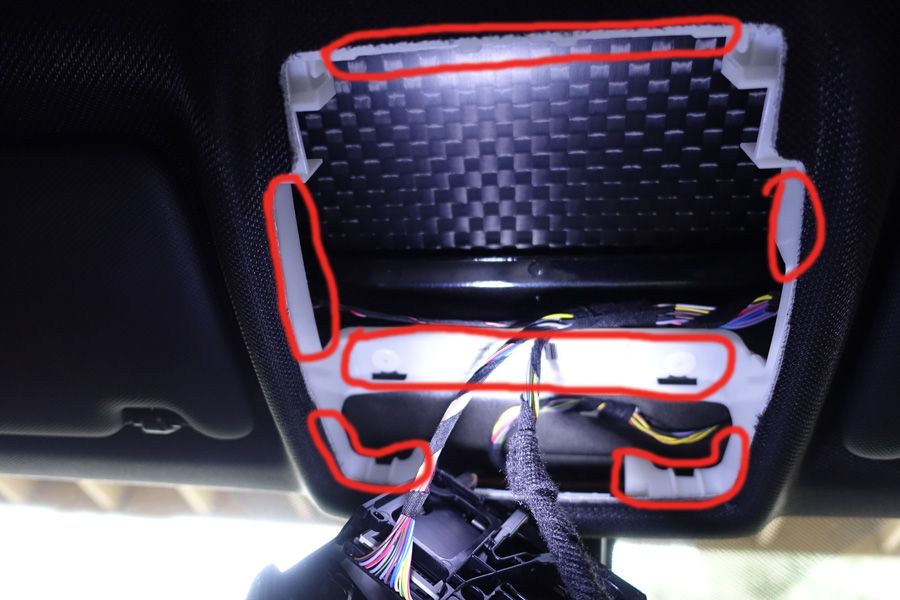
Once you take AC vent off, it will look like picture* below (sans green tape).
*This picture is borrowed from Roman@ESS.
Apply felt tape around the area that is marked red. This is area where AC vent makes contact with CF trim area.
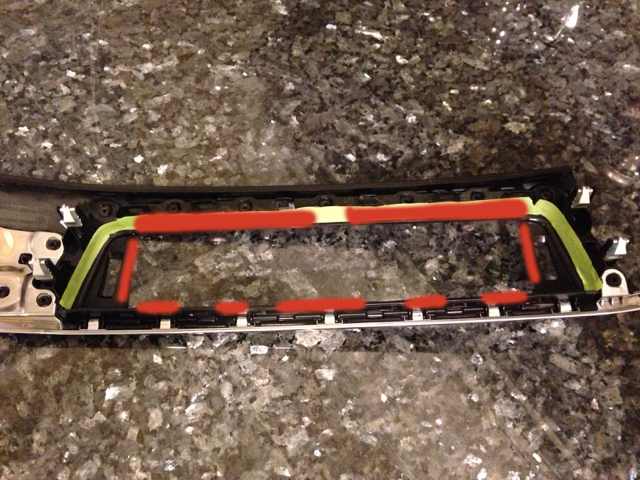
It is not necessary to show felt strips on the outside area like shown below. If you want, you can cut the tape so that it only covers inner area where AC vent piece meets the CF trim area.
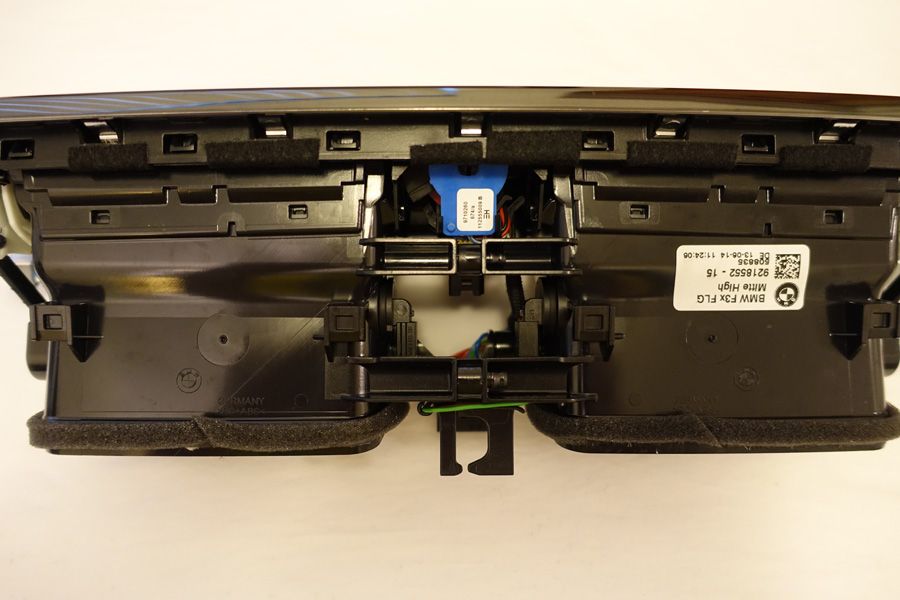
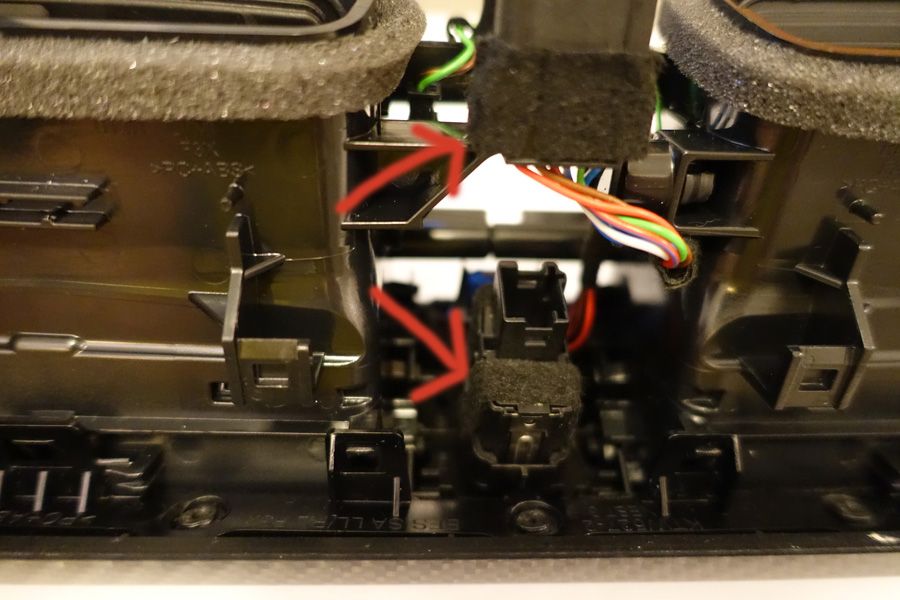
4. Secure two connector housings
I also noticed that two places that connectors go in can move a lot and make some rattle noise.
I applied felt tape around these so that they cannot move.
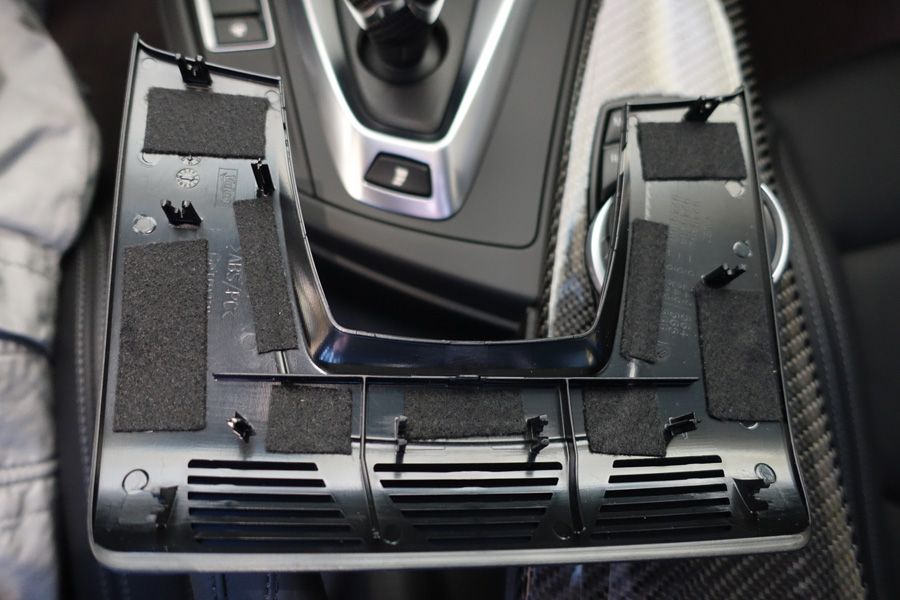
5. Apply Gummi Pflege to AC vent contact points
Gummi Pflege works great to get rid of creaking noise coming from the trim.

Apply Gummi Pflege to area highlighted in red below.


Wipe excess Gummi Pflege using microfiber.
Put the entire trim back after letting it dry for 10 minutes.
Test both door lock/unlock and emergency signal light buttons.
Tip: When you put the trim back, it may not want to snap in to place.
If you are having this problem, you may have cables stuck between ac vent and duck. Position both cables so that they do not get in the way.
I taped both cables with electrical tape so that it is easier to position them when putting the trim piece back.
3 - Dome Light Unit
There is piece of plastic covering dome light area.
Lightly pull down plastic cover using your fingers (red arrows indicate points where you need to pull down).

Apply felt tapes.
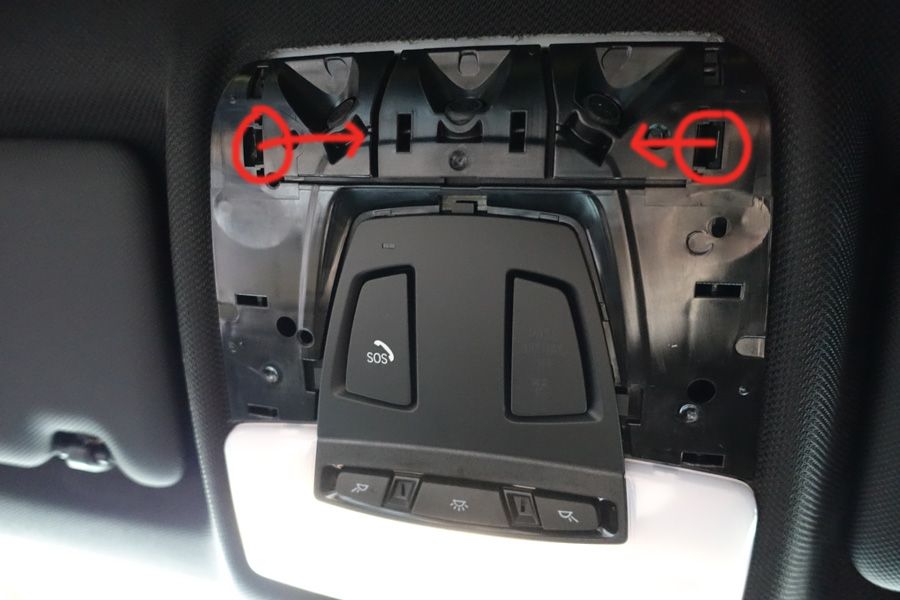
Remove entire dome light unit that is held by 2 retaining clips.
Working one side at a time, insert pry bar into the gap and push the clip to the direction of the red arrow.
While holding the pushed clip, use another pry bar to slowly pull down the unit.
Once it’s out, you will see CF roof (if you have CF roof).
Area that rattles against dome light unit is highlighted in red.
Apply felt tape directly to black dome light unit to the area that comes in contact with highlighted area below.
Install everything back.
4 - Door Seal
I was also getting some noise from door/roof area.
After searching for this issue on Google, I found out that similar problem appeared on previous generations of BMWs.
When you open the door, you will find 2 door seals.
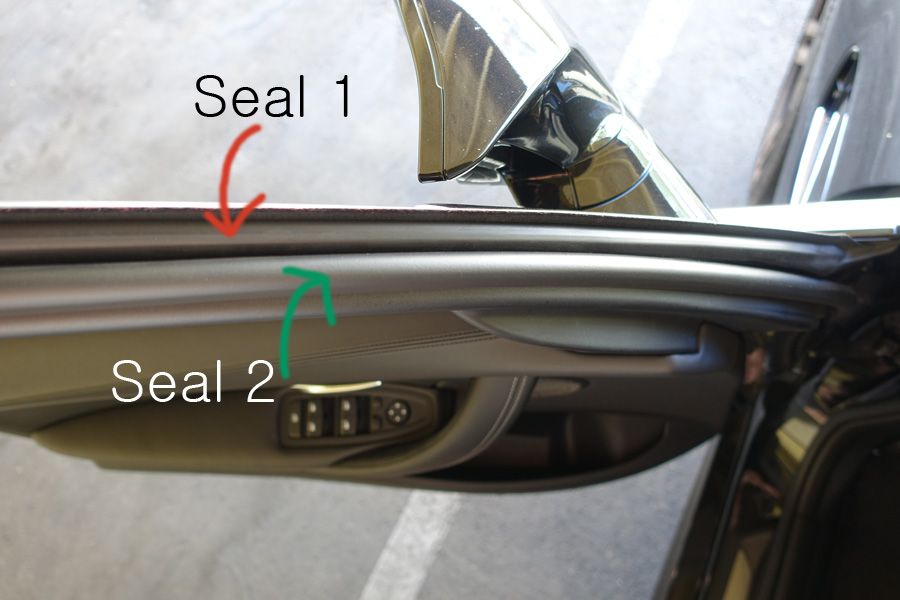
Apply Gummi Pflege on the door seal 1.
There is no need to apply Gummi on door seal 2.
Do the same things to passenger door seal(s).
Let it dry for approximately 10-15 minutes before closing the door.
Enjoy significantly quieter interior 